The Good Old Days

Every weekend I will try and find a few interesting cycling videos from before the year 2000.The years before Armstrong corporatised sport.

First, here is one Jered Gruber Tweeted earlier today. Jered is an excellent photographer as well, have a look at some of his work here and also on Flickr.

I have heard of slamming the stem, but during the race, wow!!! How would you like to hear the Giro route was coming past your shop in those days? I am pretty sure the same happened in the Tour de France as well.

I was very surprised when I was hunting YouTube for old footage to see the full documnetary movie “A Sunday in Hell” is available online. The film is a chronology of the 1976 Paris–Roubaix bicycle race from the perspective of participants, organizers and spectators. It may be only low resolution on Youtube, but it is a great watch.

Have a great weekend.

Posted in Pro Cycling | Tagged , , , , , , , | 1 Comment

Electronic Shifting, A Quick Look.

A lot has been said about electronic shifting lately. Here are a couple of videos to show you how they work. First, Campag’s EPS system. Then Shimano’s Di2.

Posted in General Cycling Info, Pro Cycling | Tagged , , , , , , | 1 Comment

Tour de Frankston

The last couple of times I have ridden a bike in Melbourne, I have had the chance to ride through Frankston. After watching this, I want to go back!

Thanks to Aushiker at ACF and Jonno and Bev on the emails for the heads up.

Posted in General Cycling Info | Tagged , , , , , | 2 Comments

Click Click Click goes the …….

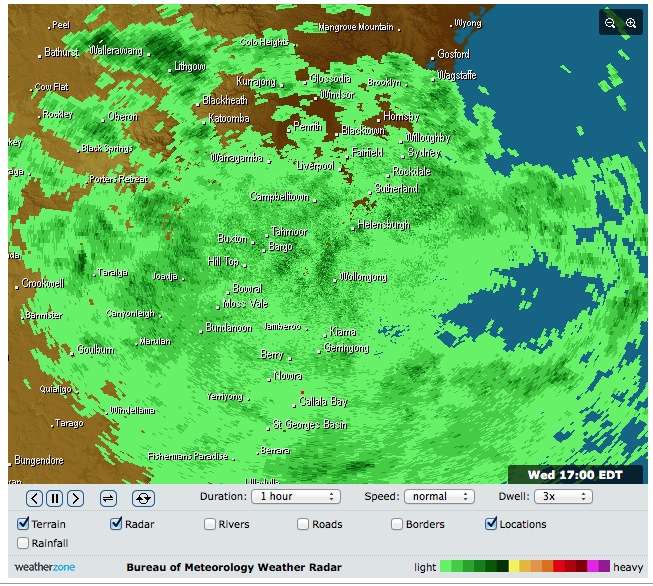
I don’t actually know. I have tried everything. Well, most things that have been suggested. When ever I pedal, I get a clicking noise from somewhere below me. Because of the weather which looks a bit like this,

Rain Rain!

I haven’t been out on the bike since I swapped the Shimano SPD-SL pedals for the Speedplays. God I hope it was the pedals.

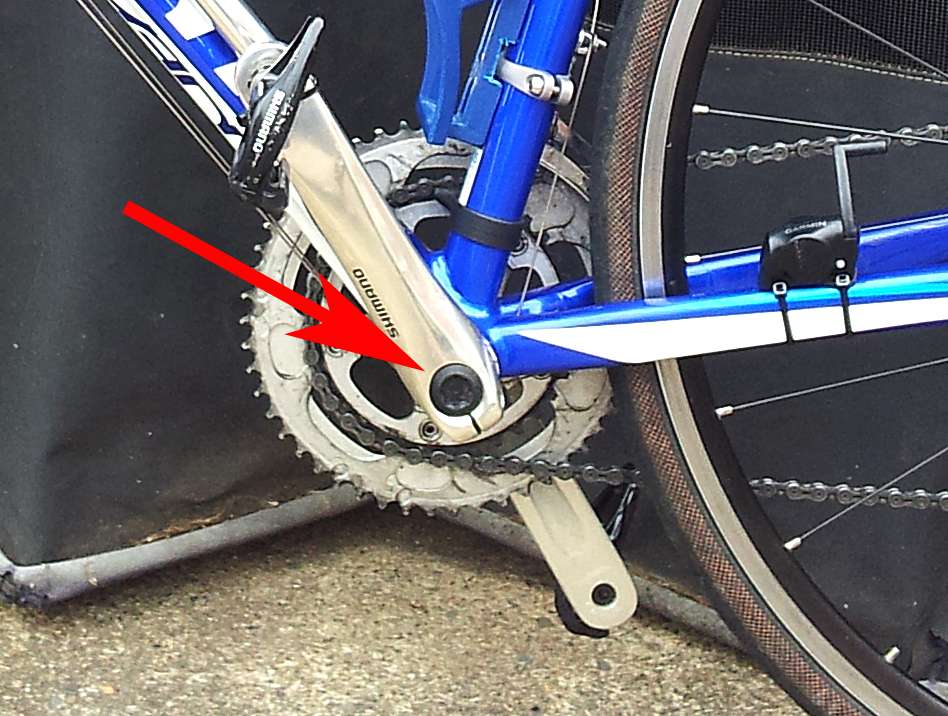
On Saturday I decided to have a crack at removing the bottom bracket just to see if it was that that was causing the noise. I was a little reluctant to do it, because I had never done it before. Also, you need a couple of specialised tools. As you can see in the photo below, there is a little cover over the crank spindle that needs to come off.

A red arrow pointing at the crank spindle cover.

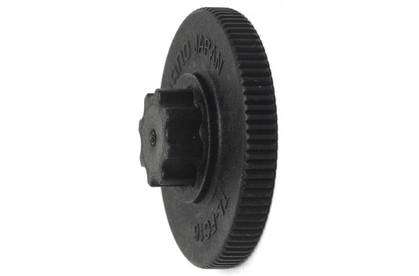
To get that off you will need either some dexterity with some needle nosed pliers, or, Shimano sell a special tool for it. It is like a massive Torx screw fitting with a wheel on it.

TL-FC16 I think.

Bingo, with that out of the way, you can under to 2 crank arm bolts and take them out, being careful that you don’t drop the little washers that are on them. With the bolts out, you can wiggle the non drive side crank arm and it should come off. Then, after taking the chain off the chainring, you should be able to pull the drive side off the bike. With the cranks out of the way, it is time to get into that bottom bracket. Another specialised tool is needed.

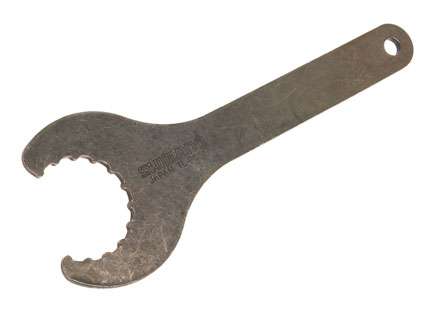
Google Shimano Bottom Bracket Tool

Being careful to line the teeth up with the grooves they fit in, and trying to keep the tool parallel to the frame of the bike, apply pressure to the bottom bracket, making sure you are undoing in the right direction. I was lucky, on the bottom of the bottom brackets it tells you which way to tighten. Well, it took a few minutes, some foul language and a rubber mallet, but I eventually moved the non drive side one. The drive side was even harder to get off. Once it is all removed, it was time for a look see.

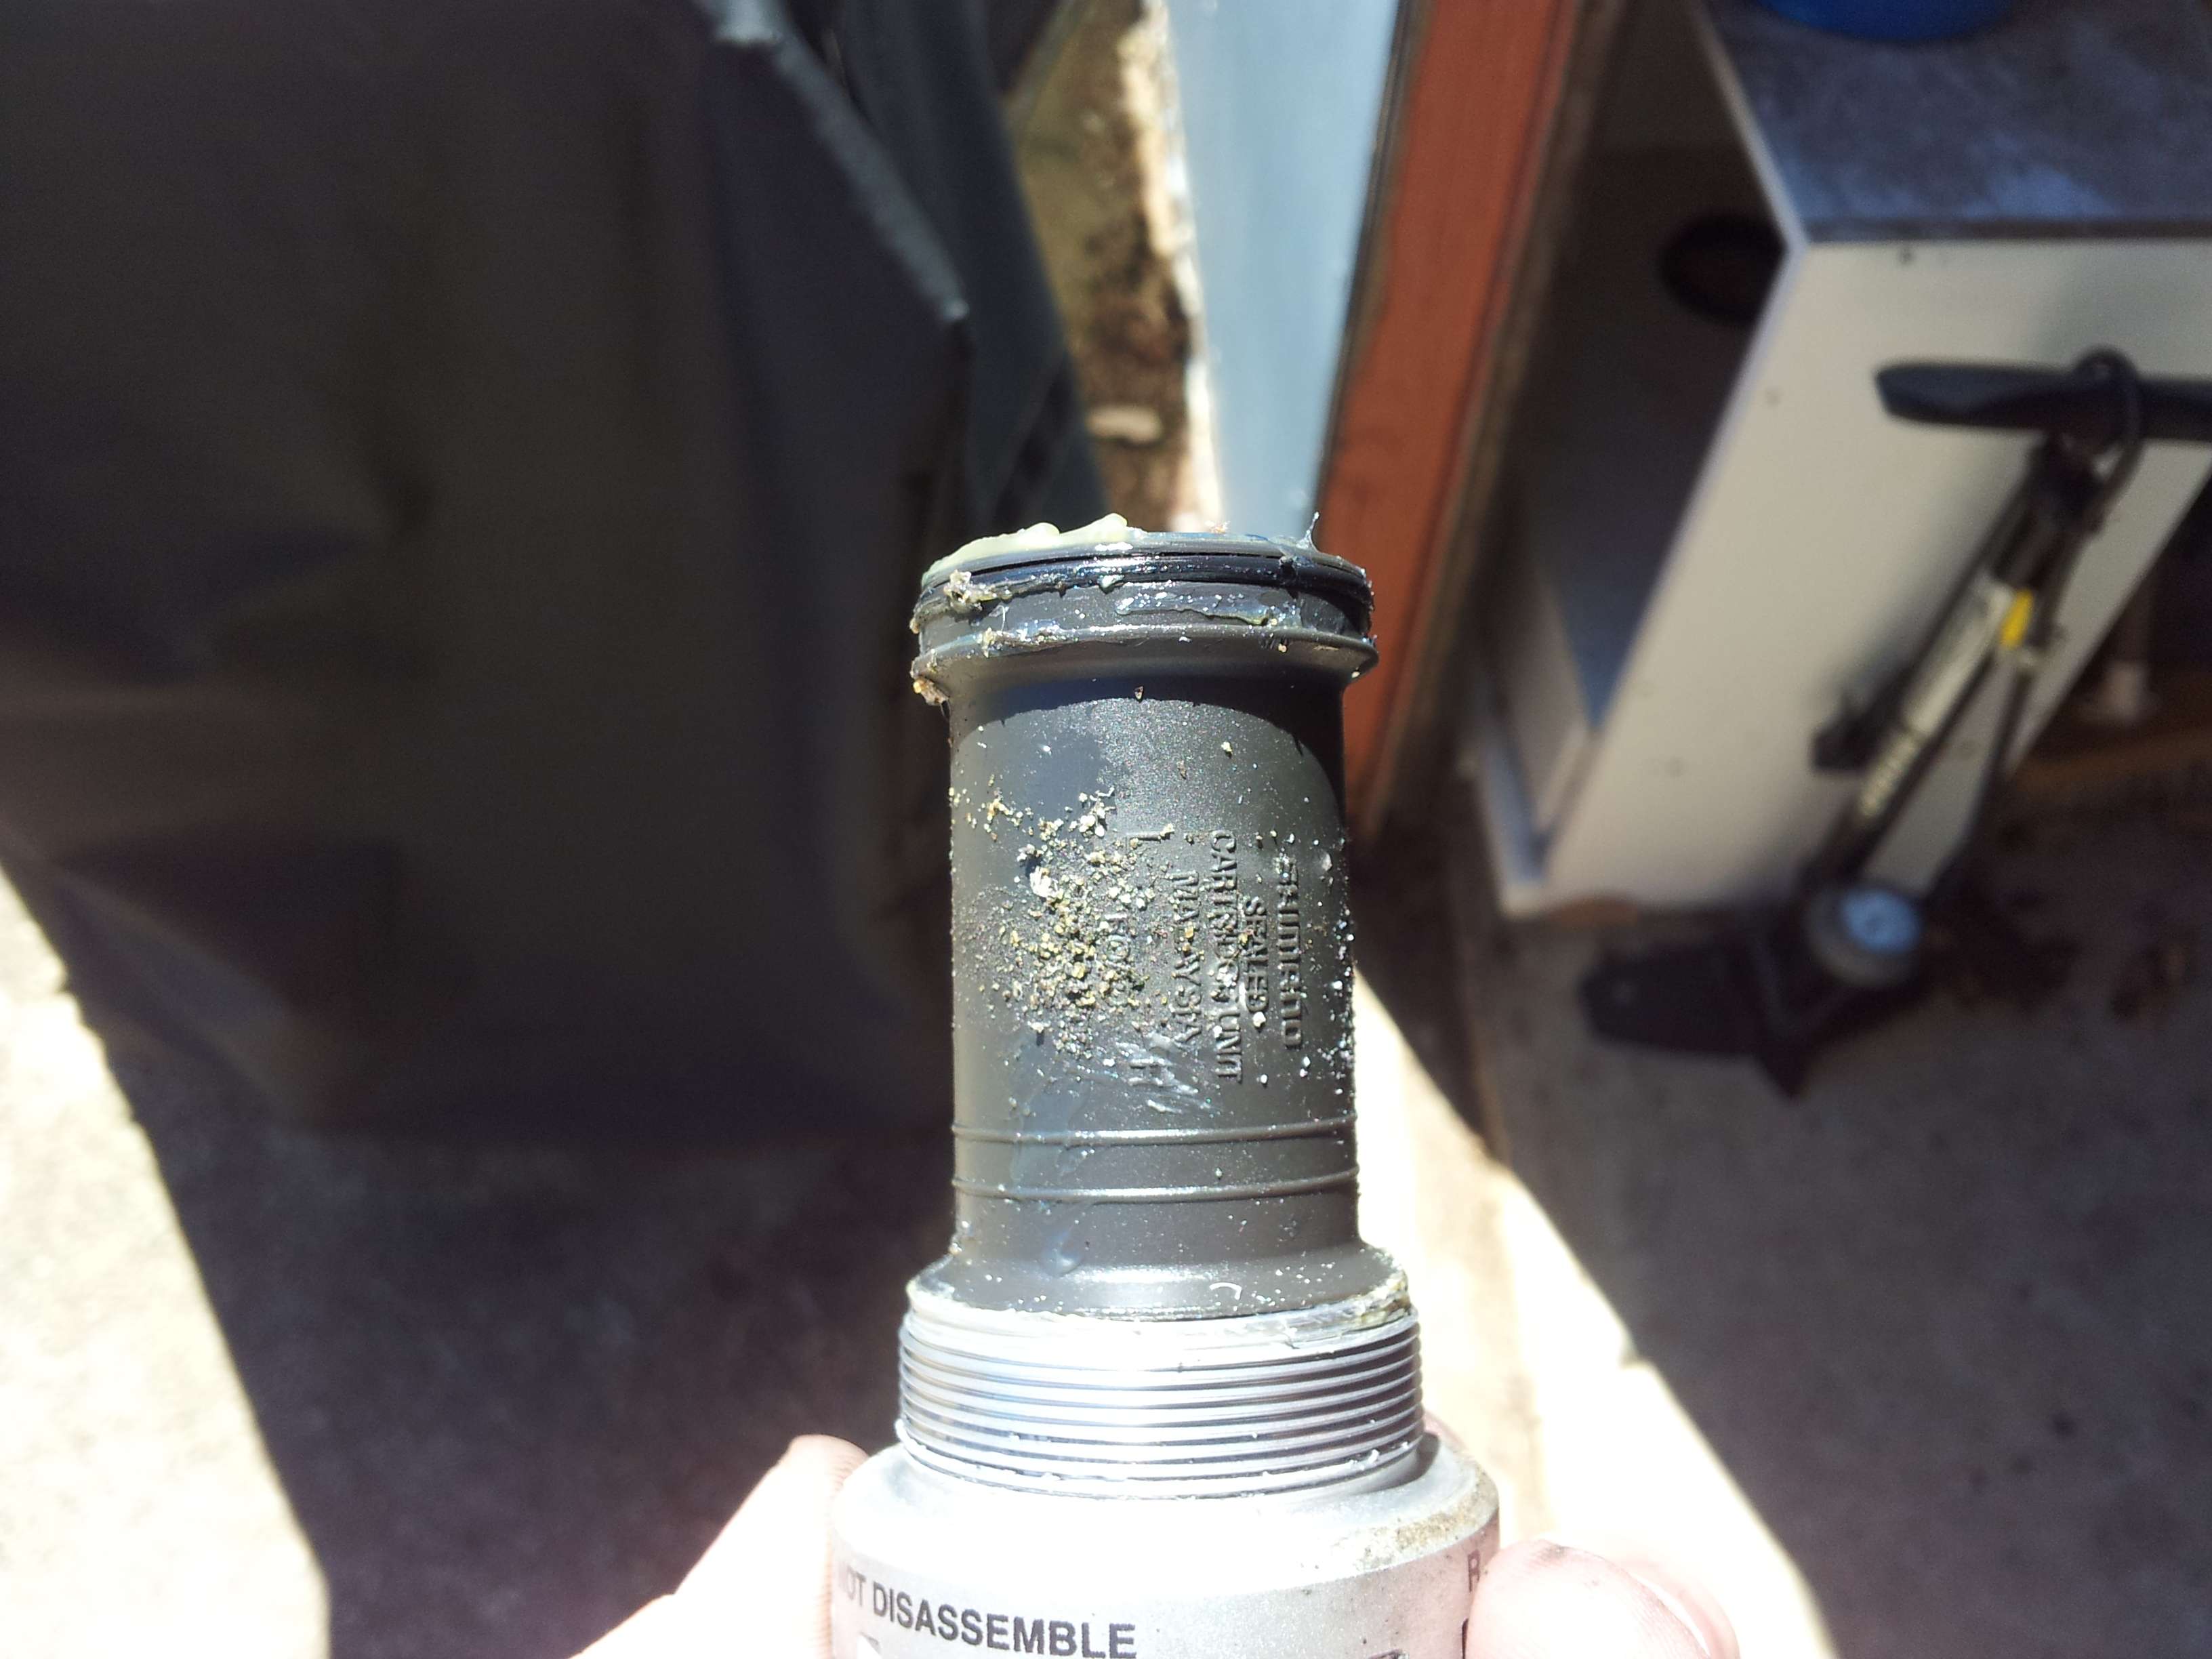
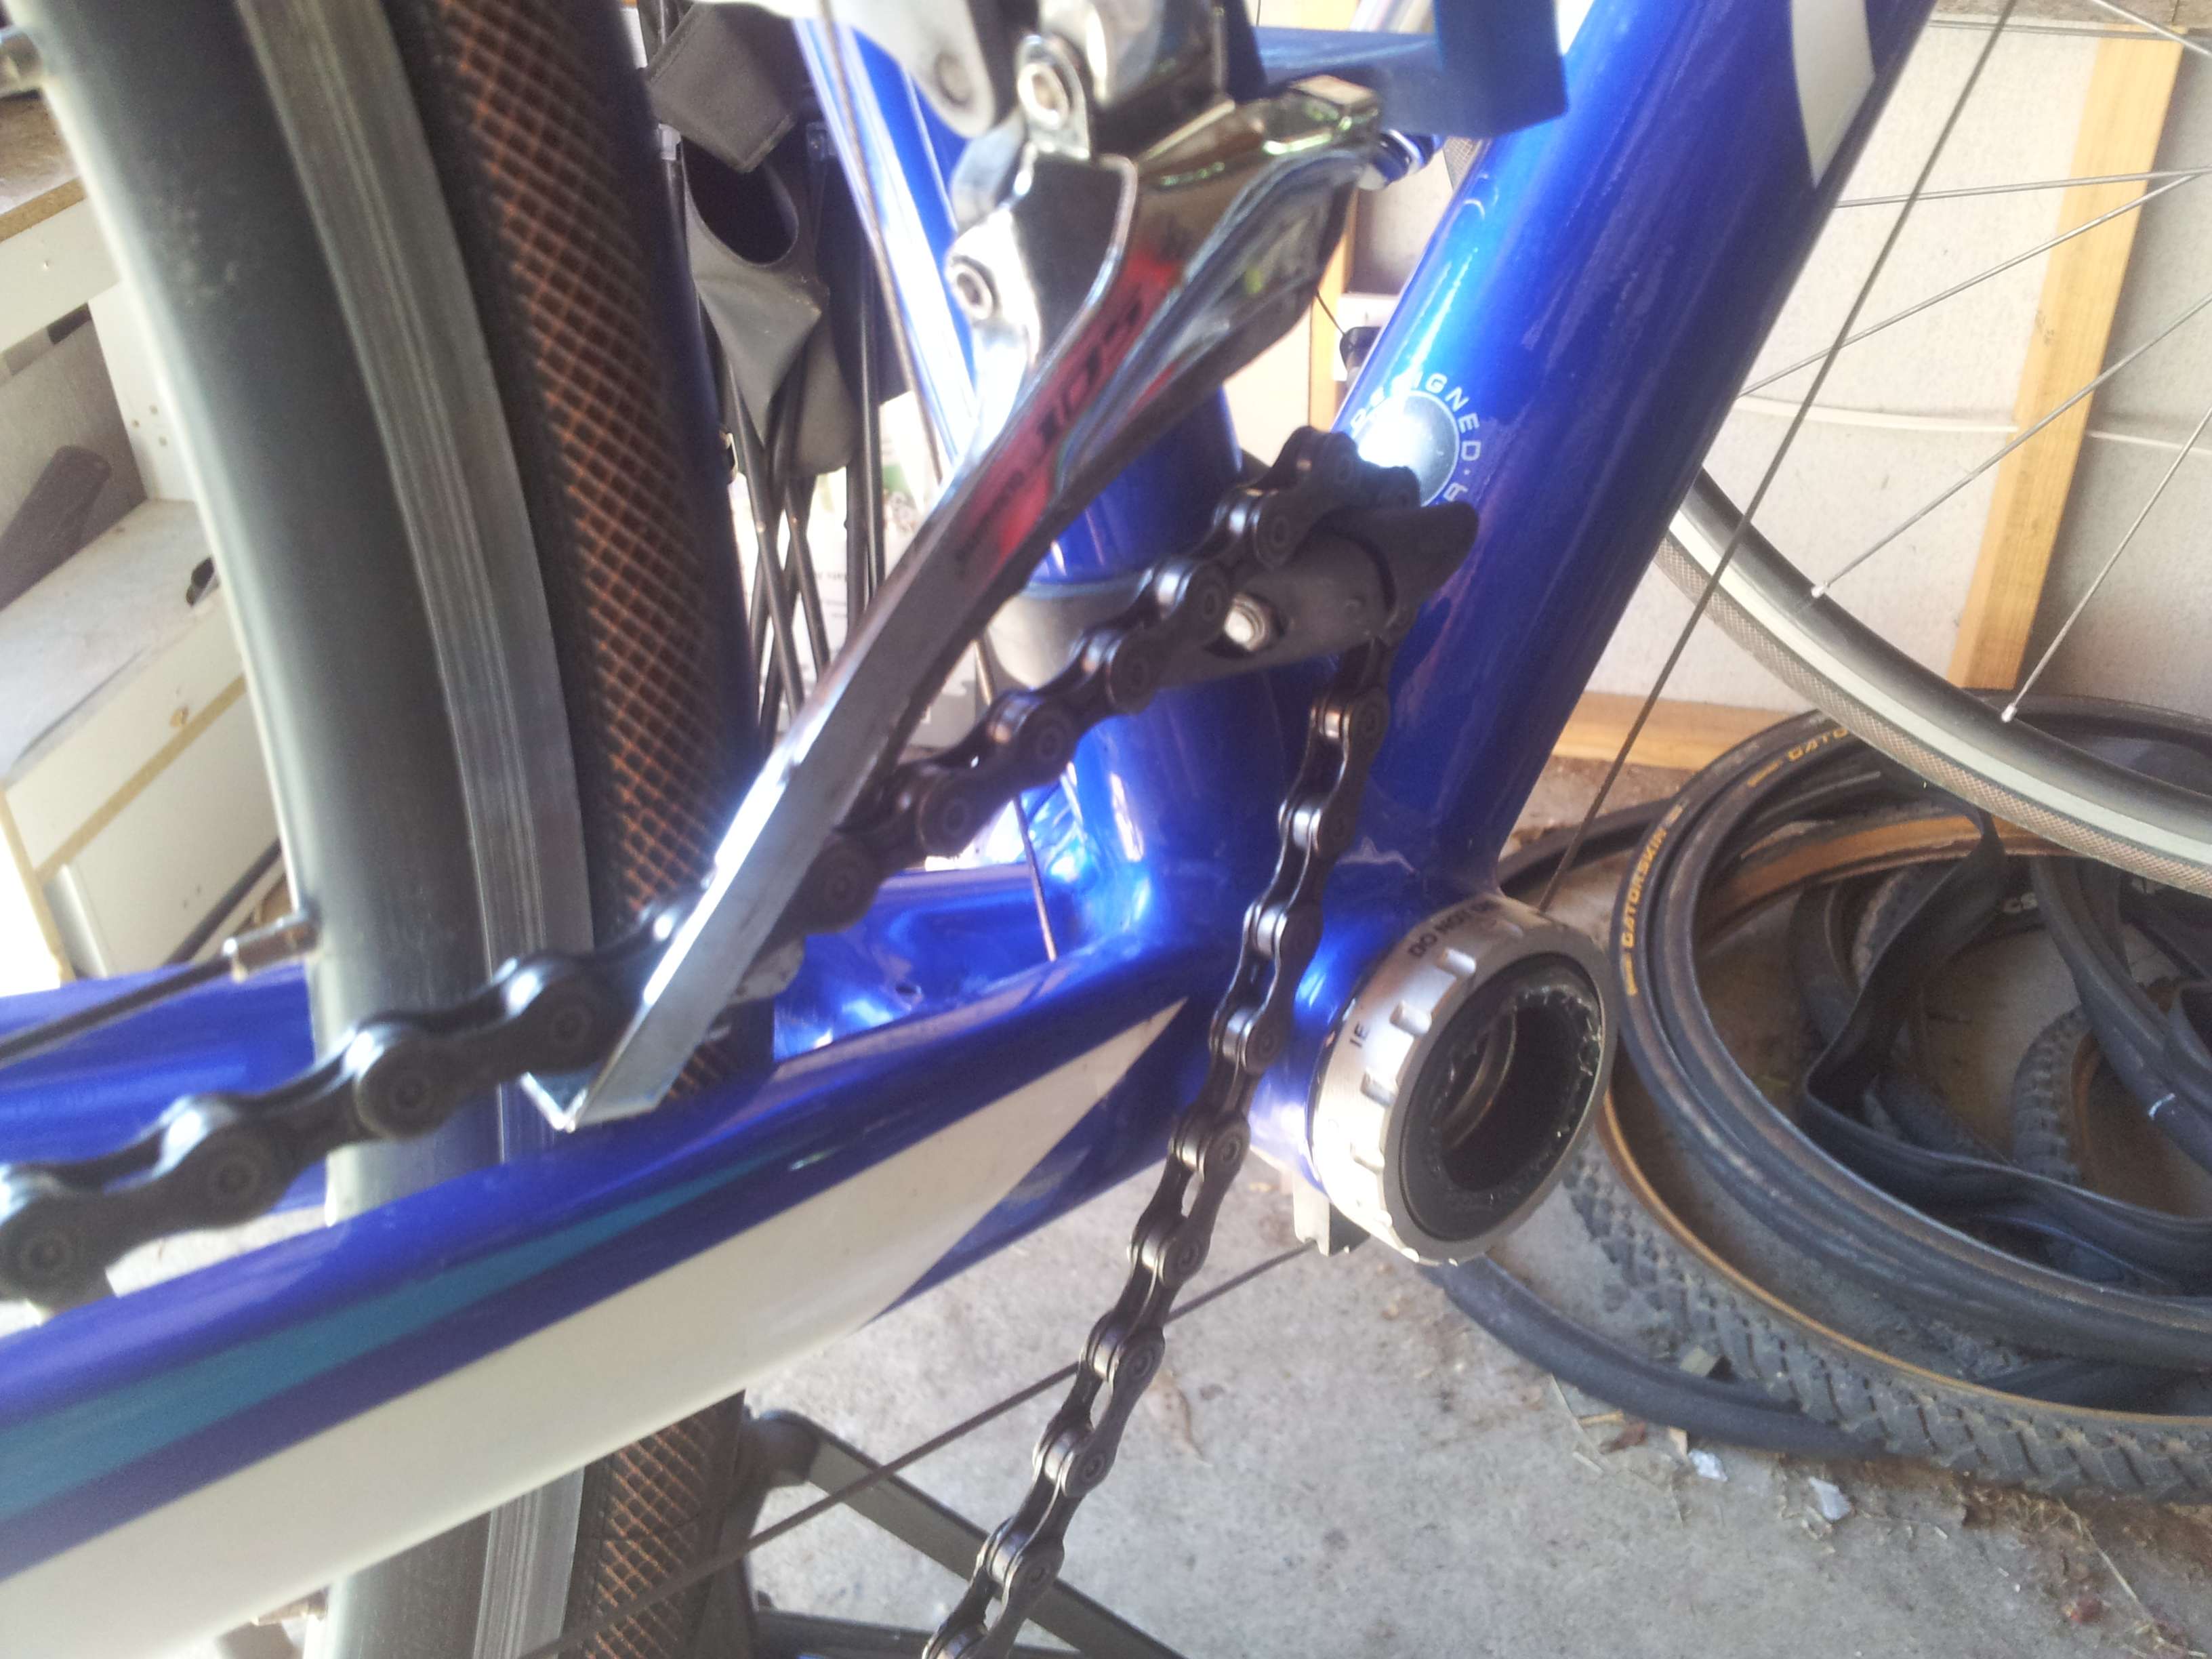
A little dirty.

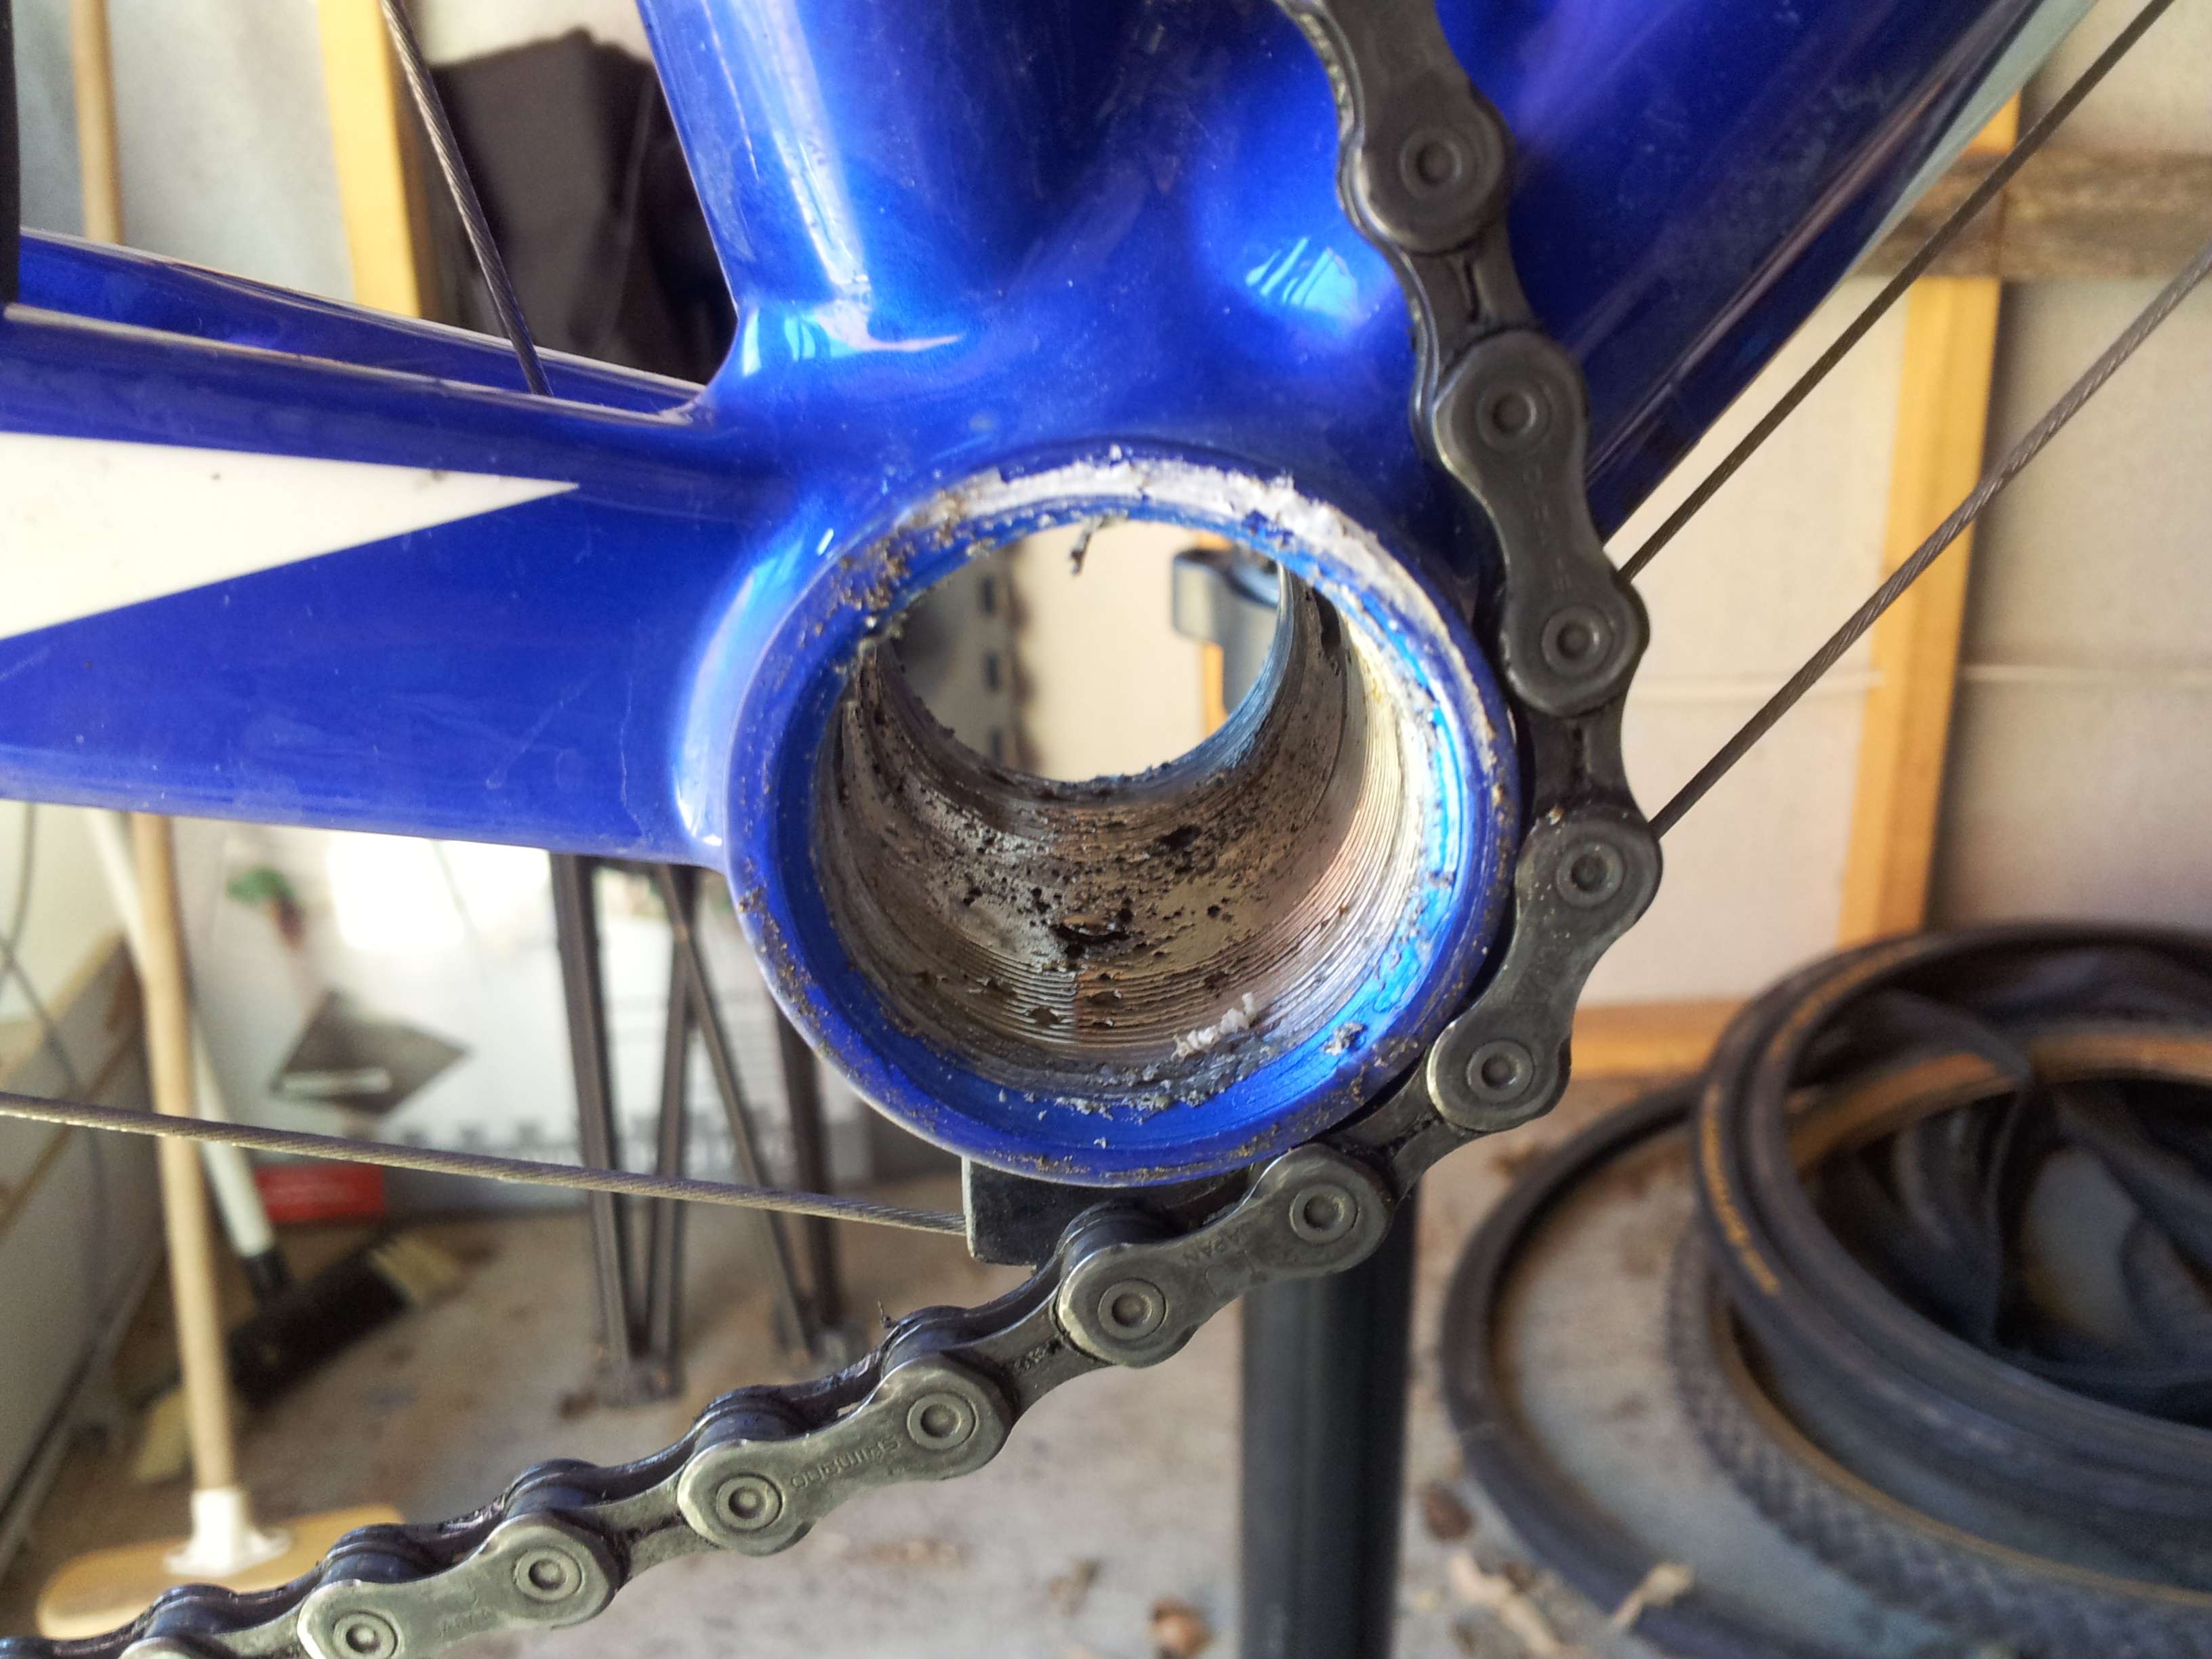
That is the bottom bracket with the non drive side bearing housing thing. I am sure some one will know exactly what it is called. And inside the bottom bracket shell.

Inside the Bottom Bracket Shell.

Nothing apart from some road grime in there. All looked good. I gave it all a good clean up, applied grease to all the threaded parts and put it all back together. A quick tip.

Oops.

Note the chain position. That is wrong obviously, but I didn’t realise until I had it all back together. D’oh!

The Correct Place for the Chain.

That is where it should be before you start throwing all the bits back together. Now remember those crank arm bolt washers I spoke about. I lost one. I spent probably 20 minutes looking around the floor of the shed. It wasn’t until I actually looked inside the crank arm that I realised it was still in there, help in by some grease. Grrrr.

So, that is it. It really isn’t all that hard to get the cranks off and have a look at the bottom bracket. Actually, with the correct tools, it is a doddle. I am confident that I can replace a bottom bracket in 15 minutes.

That is the good news. The bad, I still have the bloody click, click, click noise. Arrgghhhhhh!

PS. A big thanks to Duke for the encouragement over the phone.

Posted in General Cycling Info | Tagged , , , | 1 Comment

The Commentator. A Kickstarter project.

I’m on board. It sounds terrific. Thanks to Brad Priest for the heads up.

What is the project?

In 1976 Danish Filmmaker Jorgen Leth made the legendary sports and cycling film, A Sunday in Hell, about the Paris Roubaix cycling race. It defined a genre and helped put the Paris-Roubaix on the global sporting map. Leth now comments on the race for television.

We plan to follow Leth as he prepares for and comments on the race. We’ll be with him from his hotel in Paris until the end of the race at the Roubaix Velodrome. Along the way our team of photographers and filmmakers will shoot footage of the race, crowds and Leth himself caught up in the excitement of sport. We’ll capture the intense effort of contemporary pro racers, and will be sure to include stars from cycling’s past.

The Commentator will screen all over the world as part of the Bicycle Film Festival programming.

Posted in General Cycling Info, Pro Cycling | Tagged , , , , , , | 4 Comments

How Do You Know The Euro Cycling Season Has Started?

Because the race names sound like an Ommpa Loompa casting call!

The Oompa de Loomp Kronberg Mur Boom Lars Herring Classic

Posted in General Cycling Info | Tagged , , , | Comments Off on How Do You Know The Euro Cycling Season Has Started?

Review : Speedplay Light Action Pedals. Setting Up.

As mentioned yesterday, the Speedplay Light Action Stainless Steel pedals arrived at the door. This post will be purely about setting them up for a ride, not actually using them. That will be a different review.

Some history about pedals and this Non Pro Cyclist. I first used clipless pedals in the early 1990s. Shimano SPD (Shimano Pedaling Dynamics). The first pedals that I had were purple and white and single sided, which, on a mountain bike, didn’t work to well. I then changed to a double sided SPD pedal. Well, it had a cleated side and a flat platform on the other side. I continued using these for years. it wasn’t until I got the Avanti Giro 4 in 2011 that I finally dropped the SPD system in favour of the SPD-SL. Finally I was walking around sounding like a horse clip clopping about the place.

A few weeks back I was in the local bike shop and looking at a bike with Speedplay pedals on it. I didn’t think a real lot of it. But within a week, the order was in and they arrived yesterday. A few things happened along the way to help the decision, but I am sworn to secrecy about them. 🙂

The set up.

I had heard that the Speedplays can be a bit tricky to set up, so I sent an email off to Speedplay asking some questions. Steve Tyler from Speedplay Inc got back to me and was very helpful. He sent me some links to PDF files and also a video. I had a quick look at them, and it didn’t seem to hard to figure out. So off I went.

I was mounting the cleats to Shimano R087 shoes, which have a 3 hole attachment system. Speedplays use 4 holes, so you have to add an adapter. The adapter comes fitted with 1F and 1R shims, but I need to use the 4F and 4R shims. It was easy to remove the factory fitted shims and replace them with the 4F and 4R shims.
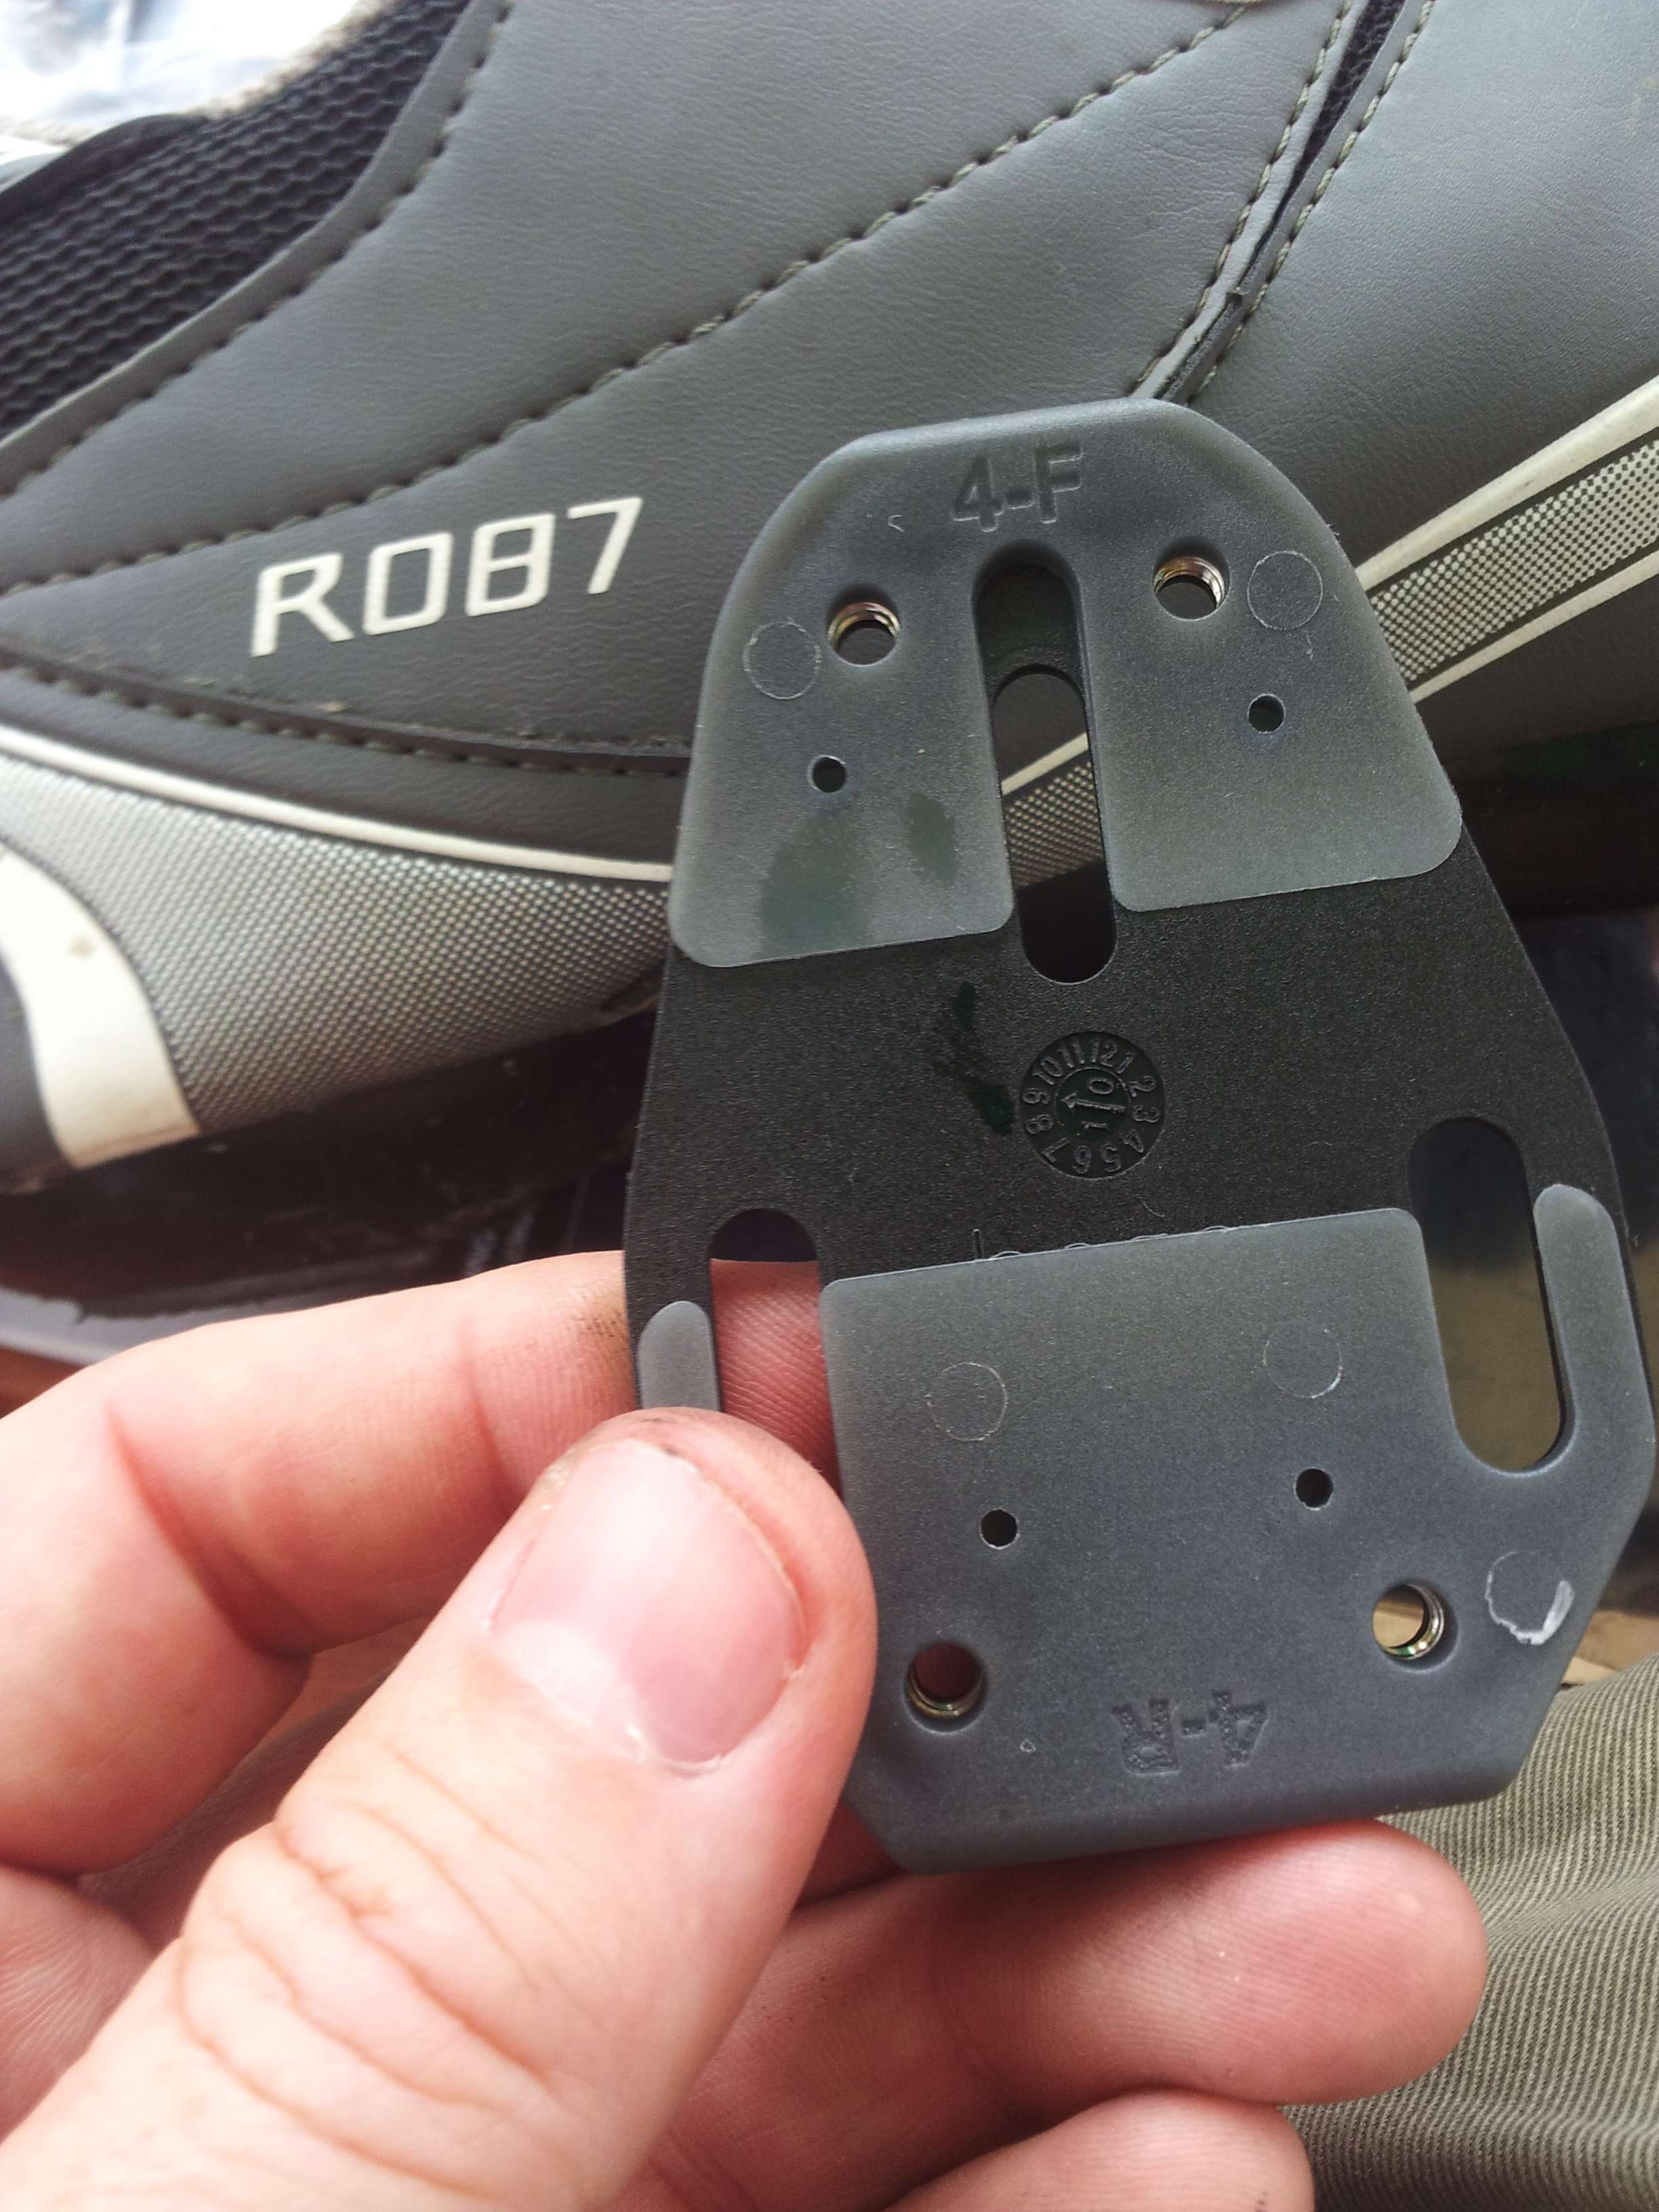
Base Plate and Snap Shims

The shims are to make sure the plate fits flush to the sole of the shoe. As can be seen below, it works pretty well.

Shims in place.

I had to use the longer of the cleat mounting screws, which are silver in colour. The shorter ones are black.

Base Plate mounted to Shoe.

Then you have to mount the actual cleat itself. Obviously with the cleat cut out on the inside of the shoe to accommodate the pedal spindle.
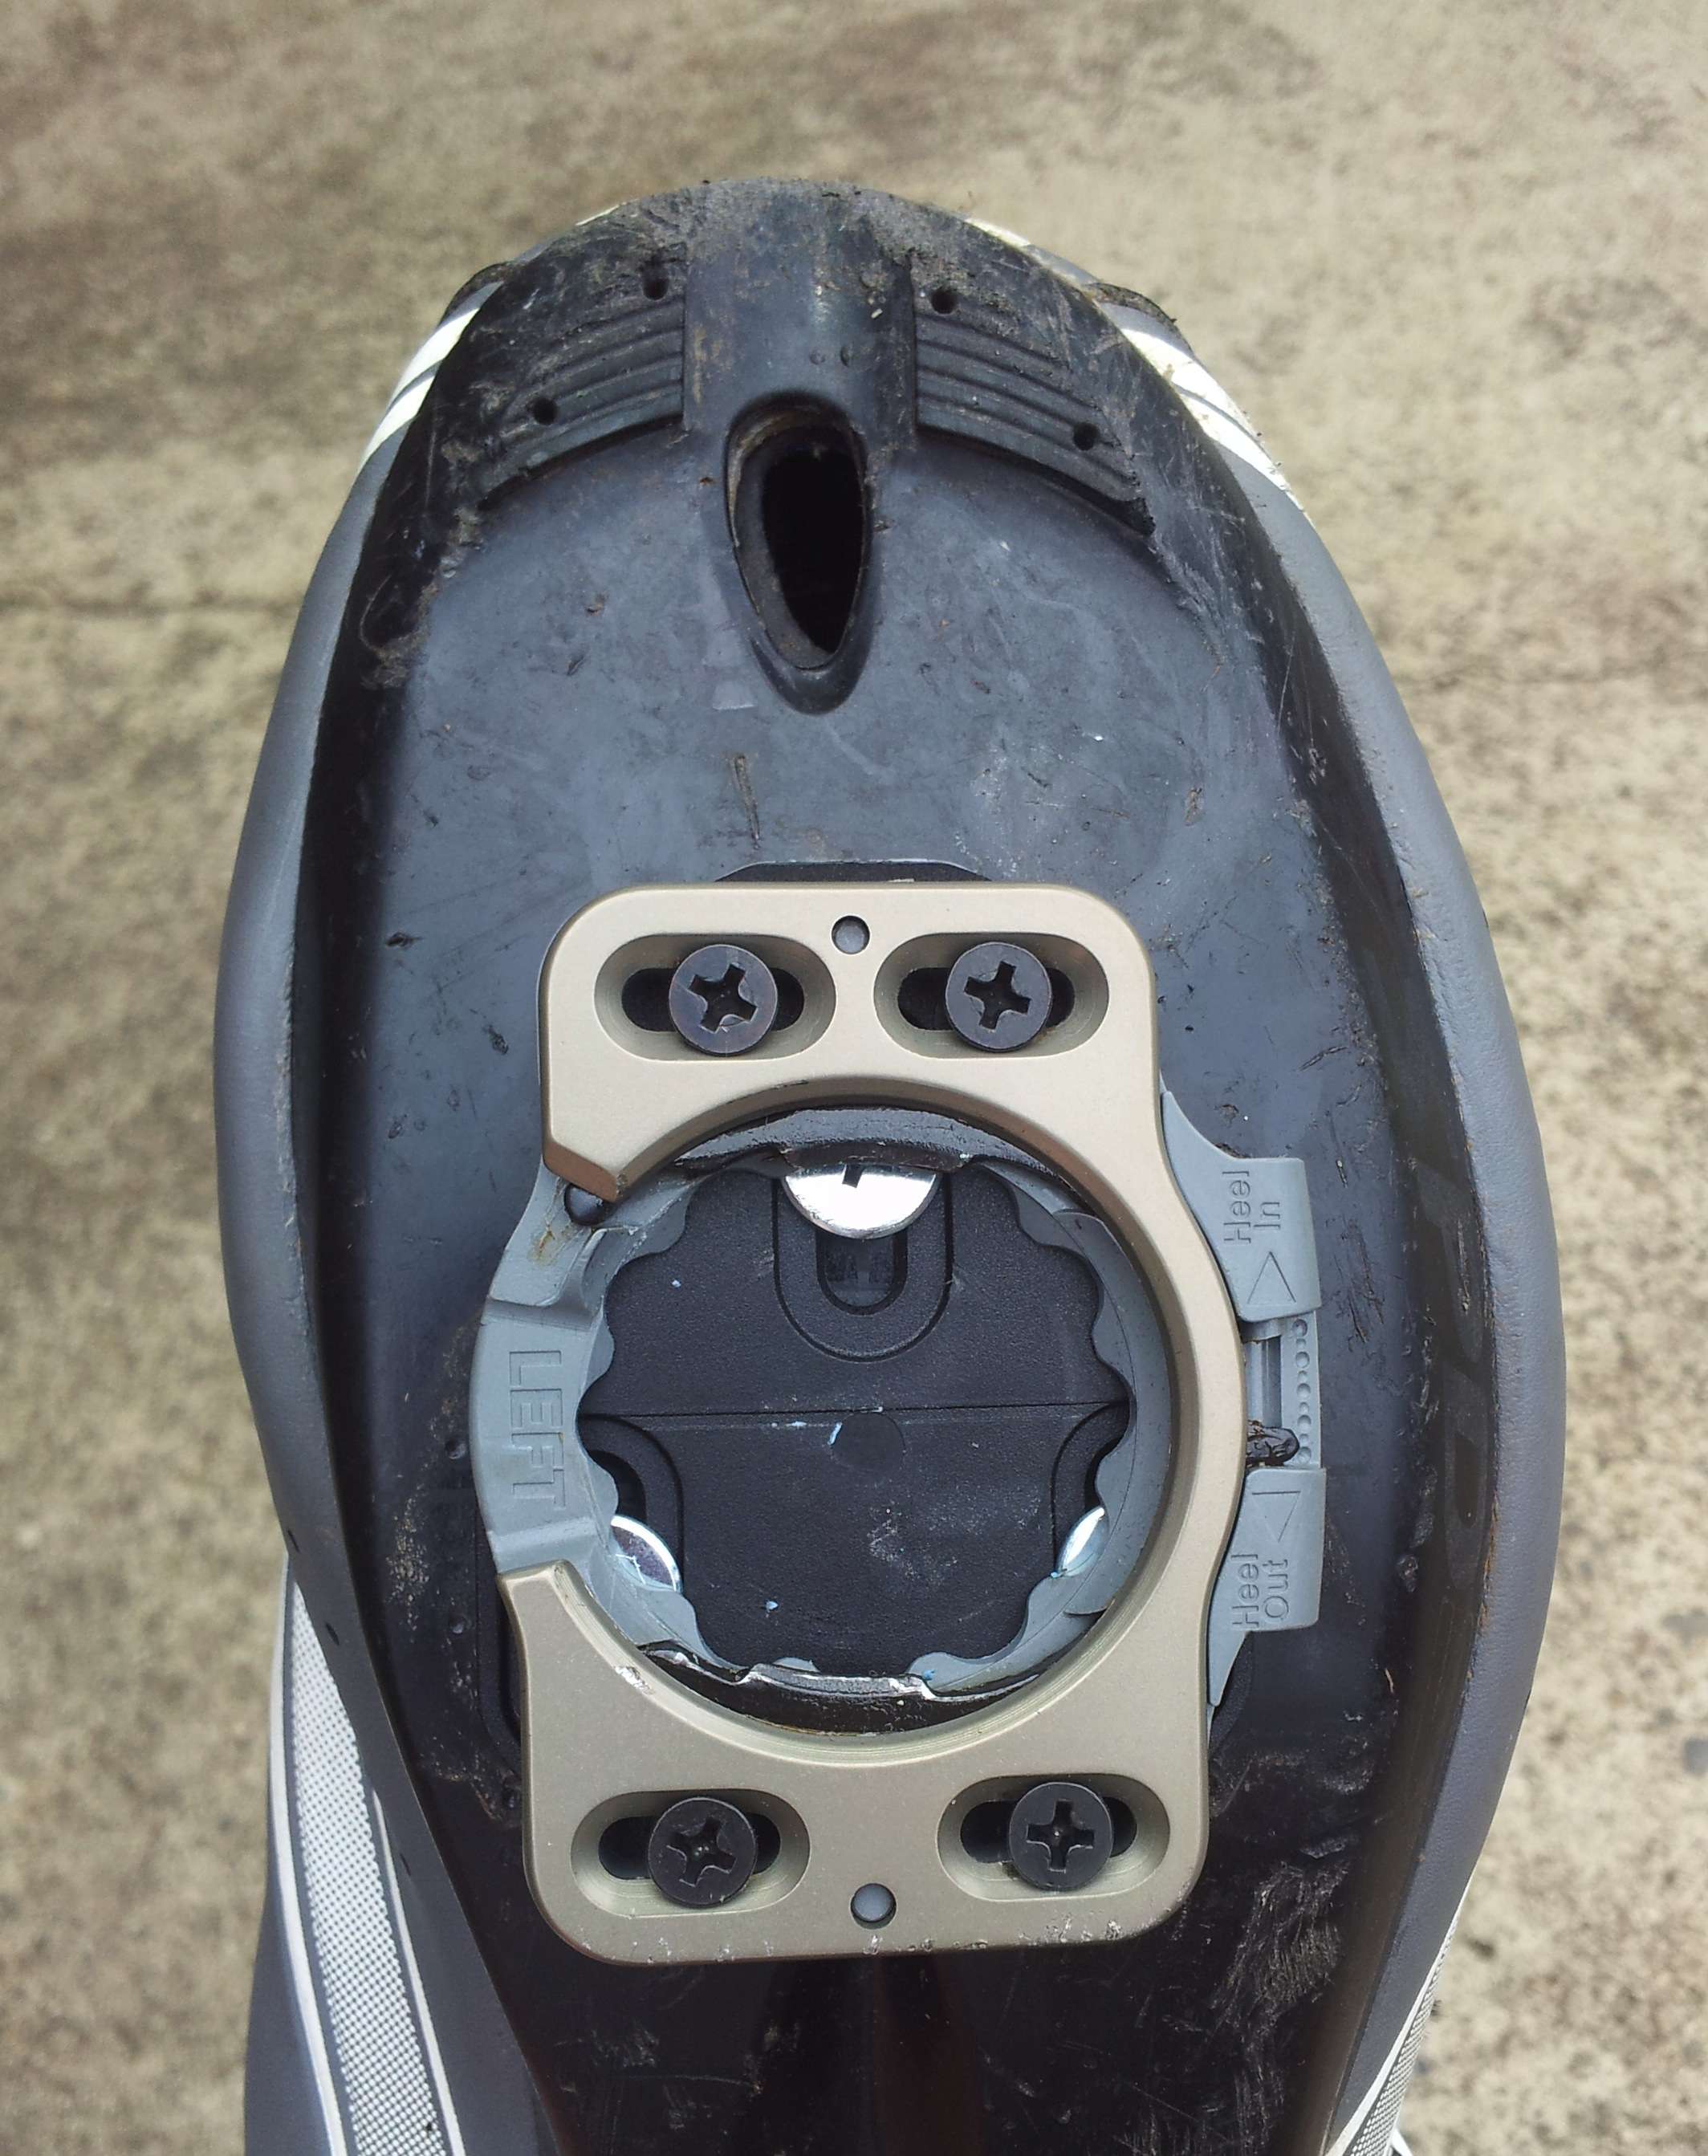
Cleat Mounted to base plate.

Tighten them up and your cleat is on. Obviously, there will be some playing around with cleat position fore and aft, but once your are happy, that is all that needs to be done.

The pedals went on easily, just a dab of grease on the thread and a 15mm pedal spanner and the job was done.
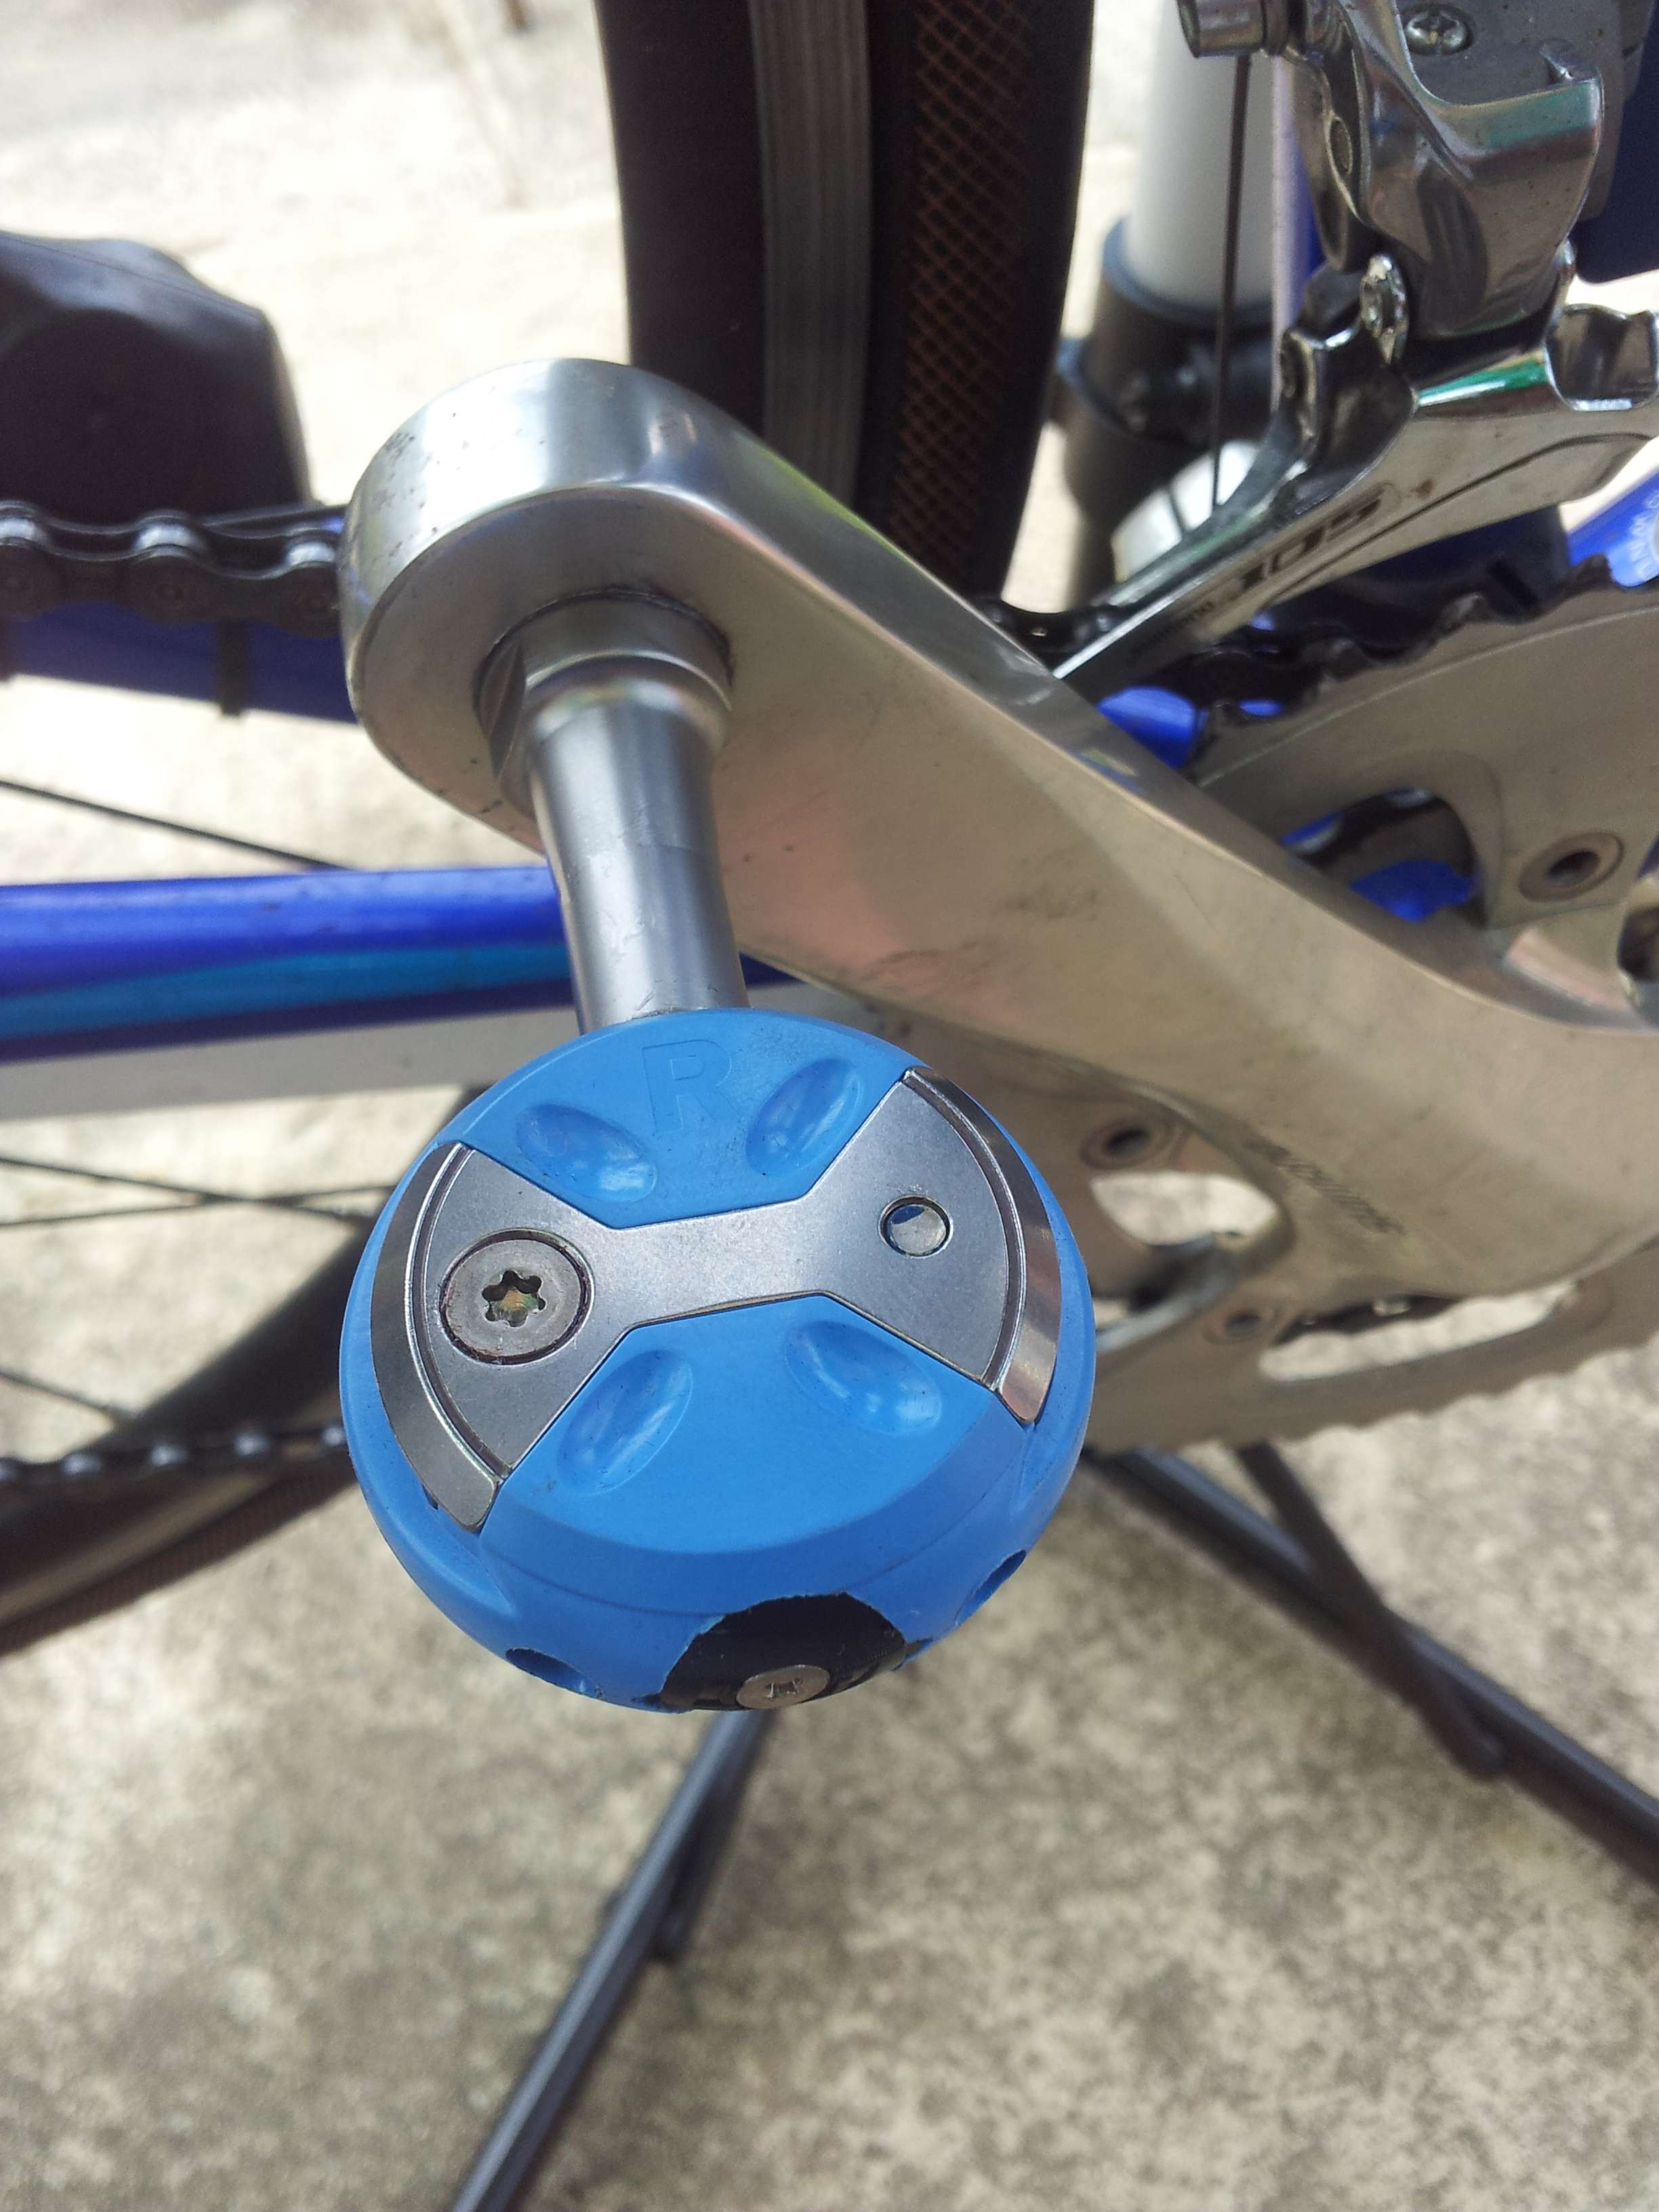
More Blue.

It took slightly longer to fit the cleats on the Speedplays than it did for the SPD-SLs. mainly because on the SPD-SL there is only 3 screws per shoe, where as the Speedplays have 7 in total per shoe. If you have a compatible shoe with 4 holes, it will be easier.

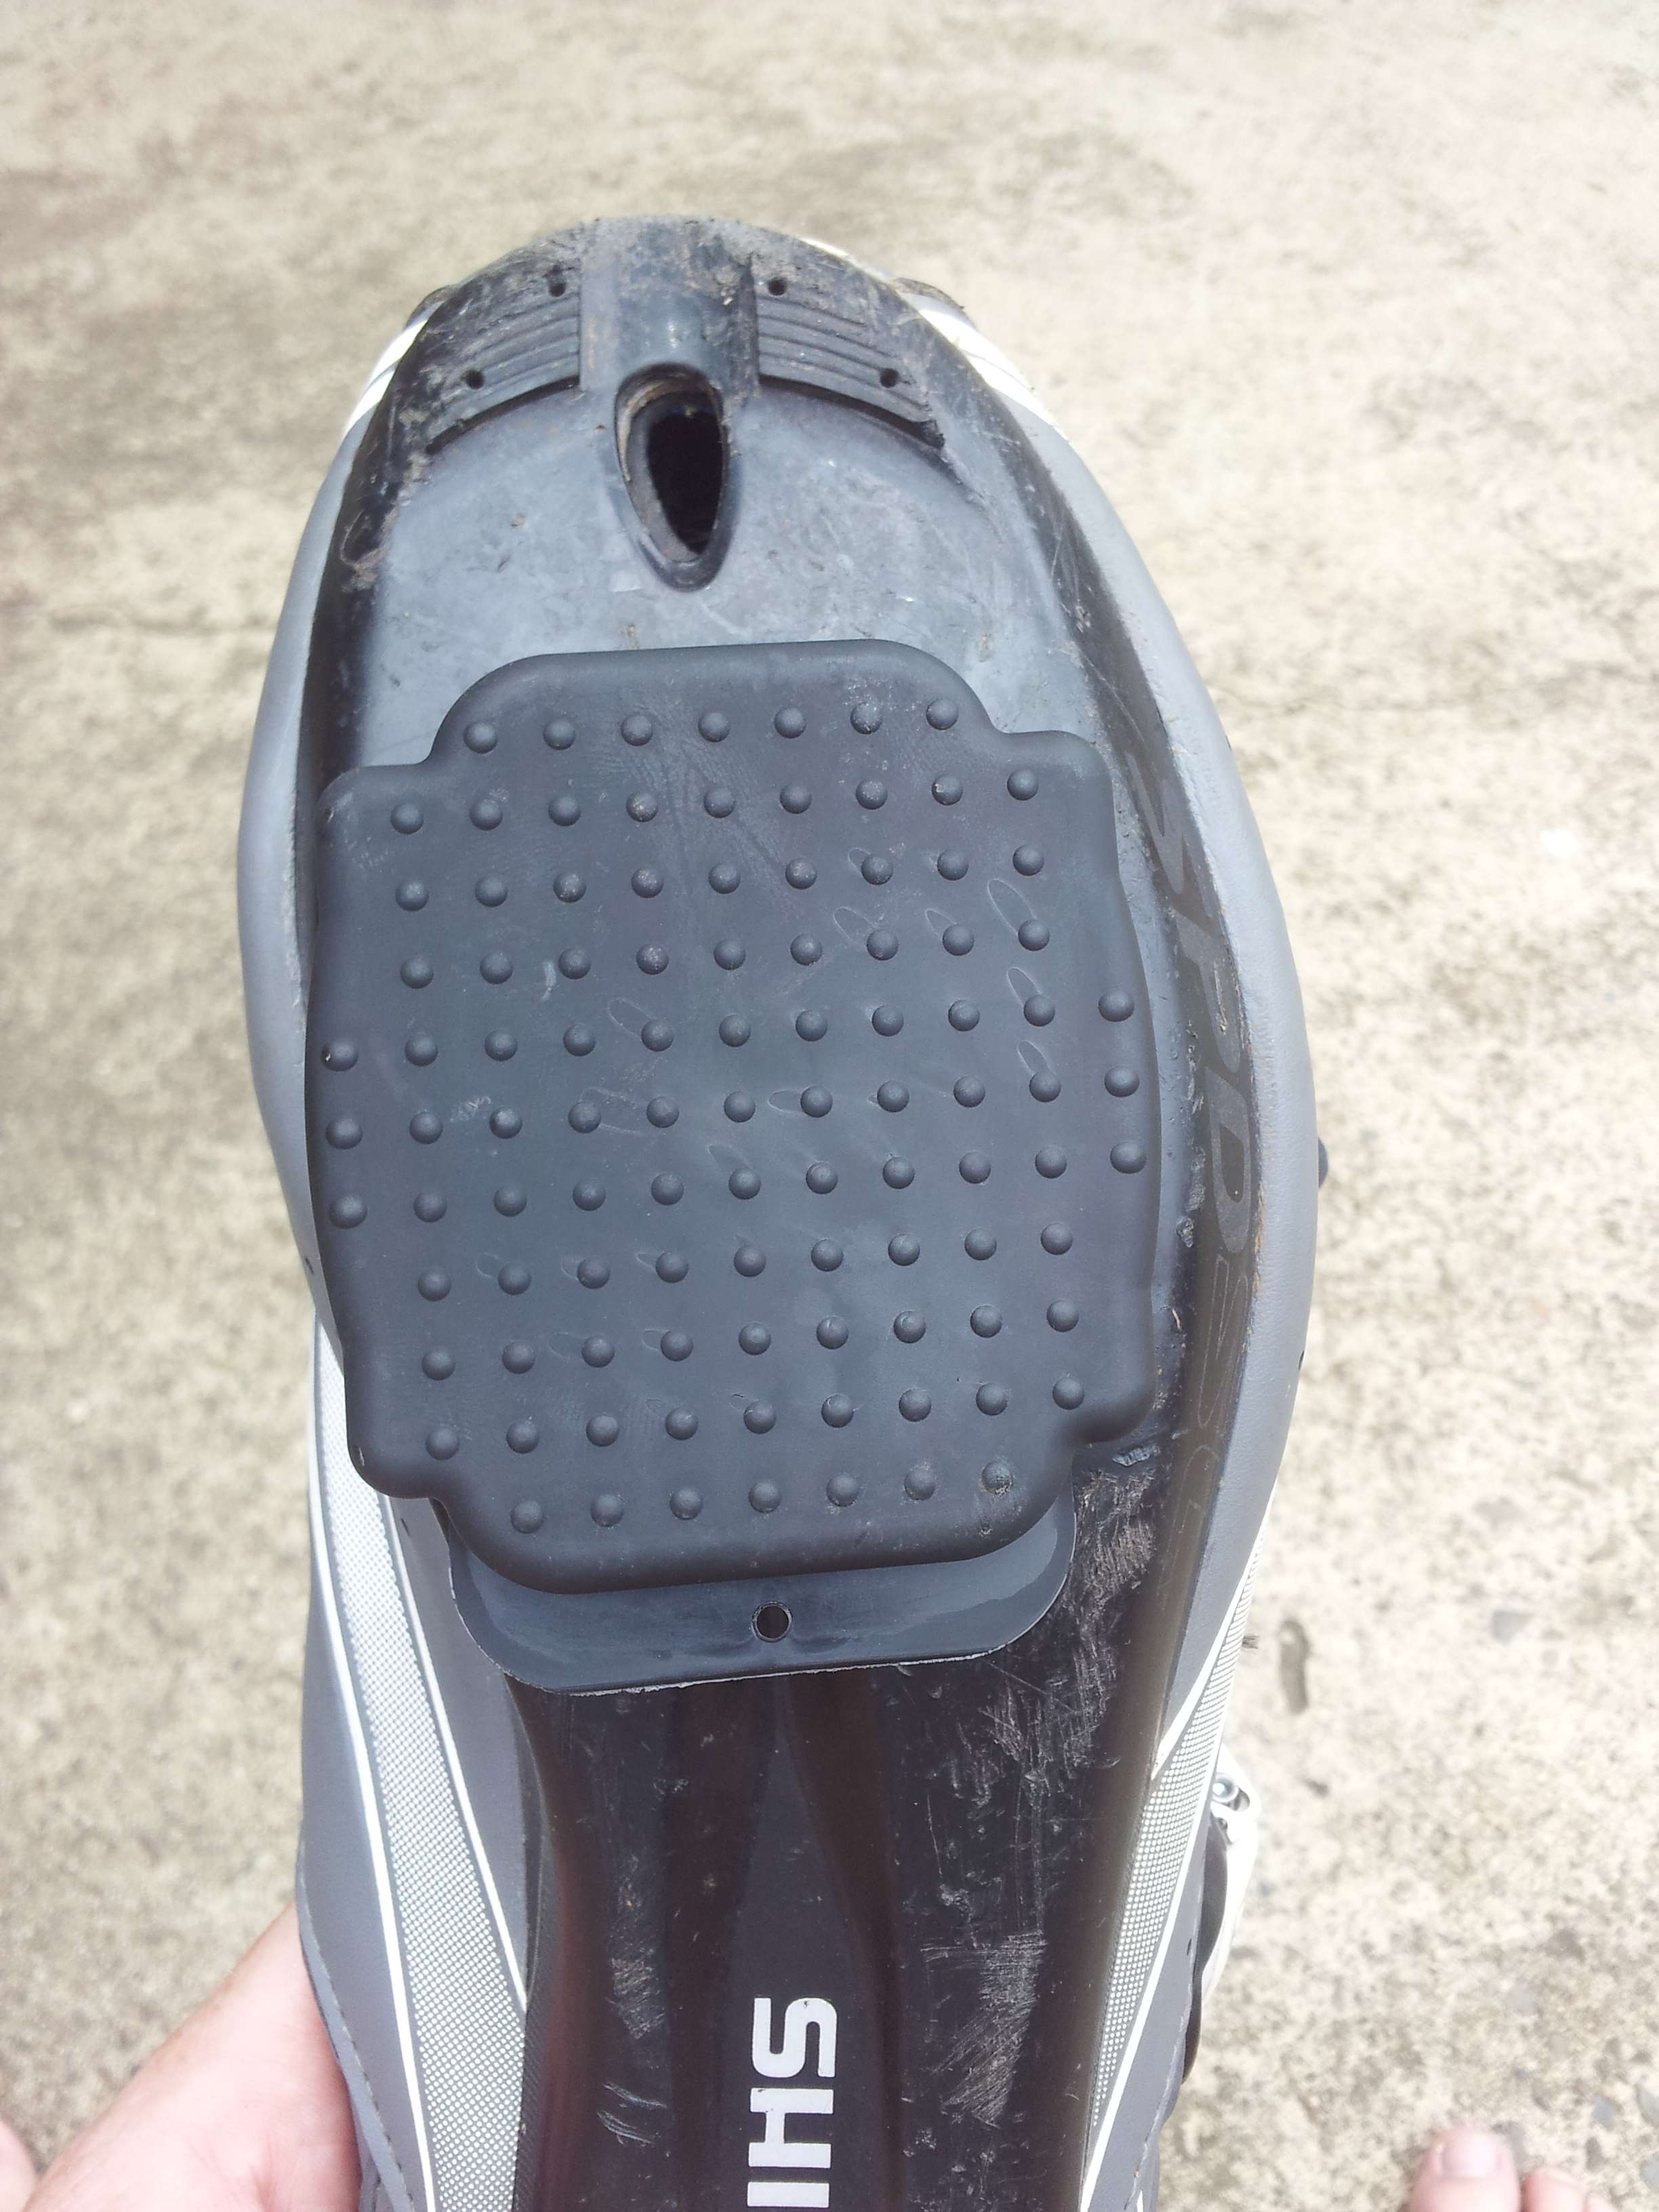
As a further comparison between the two brands, I took some photos of the height difference of the shoes with the cleats mounted.
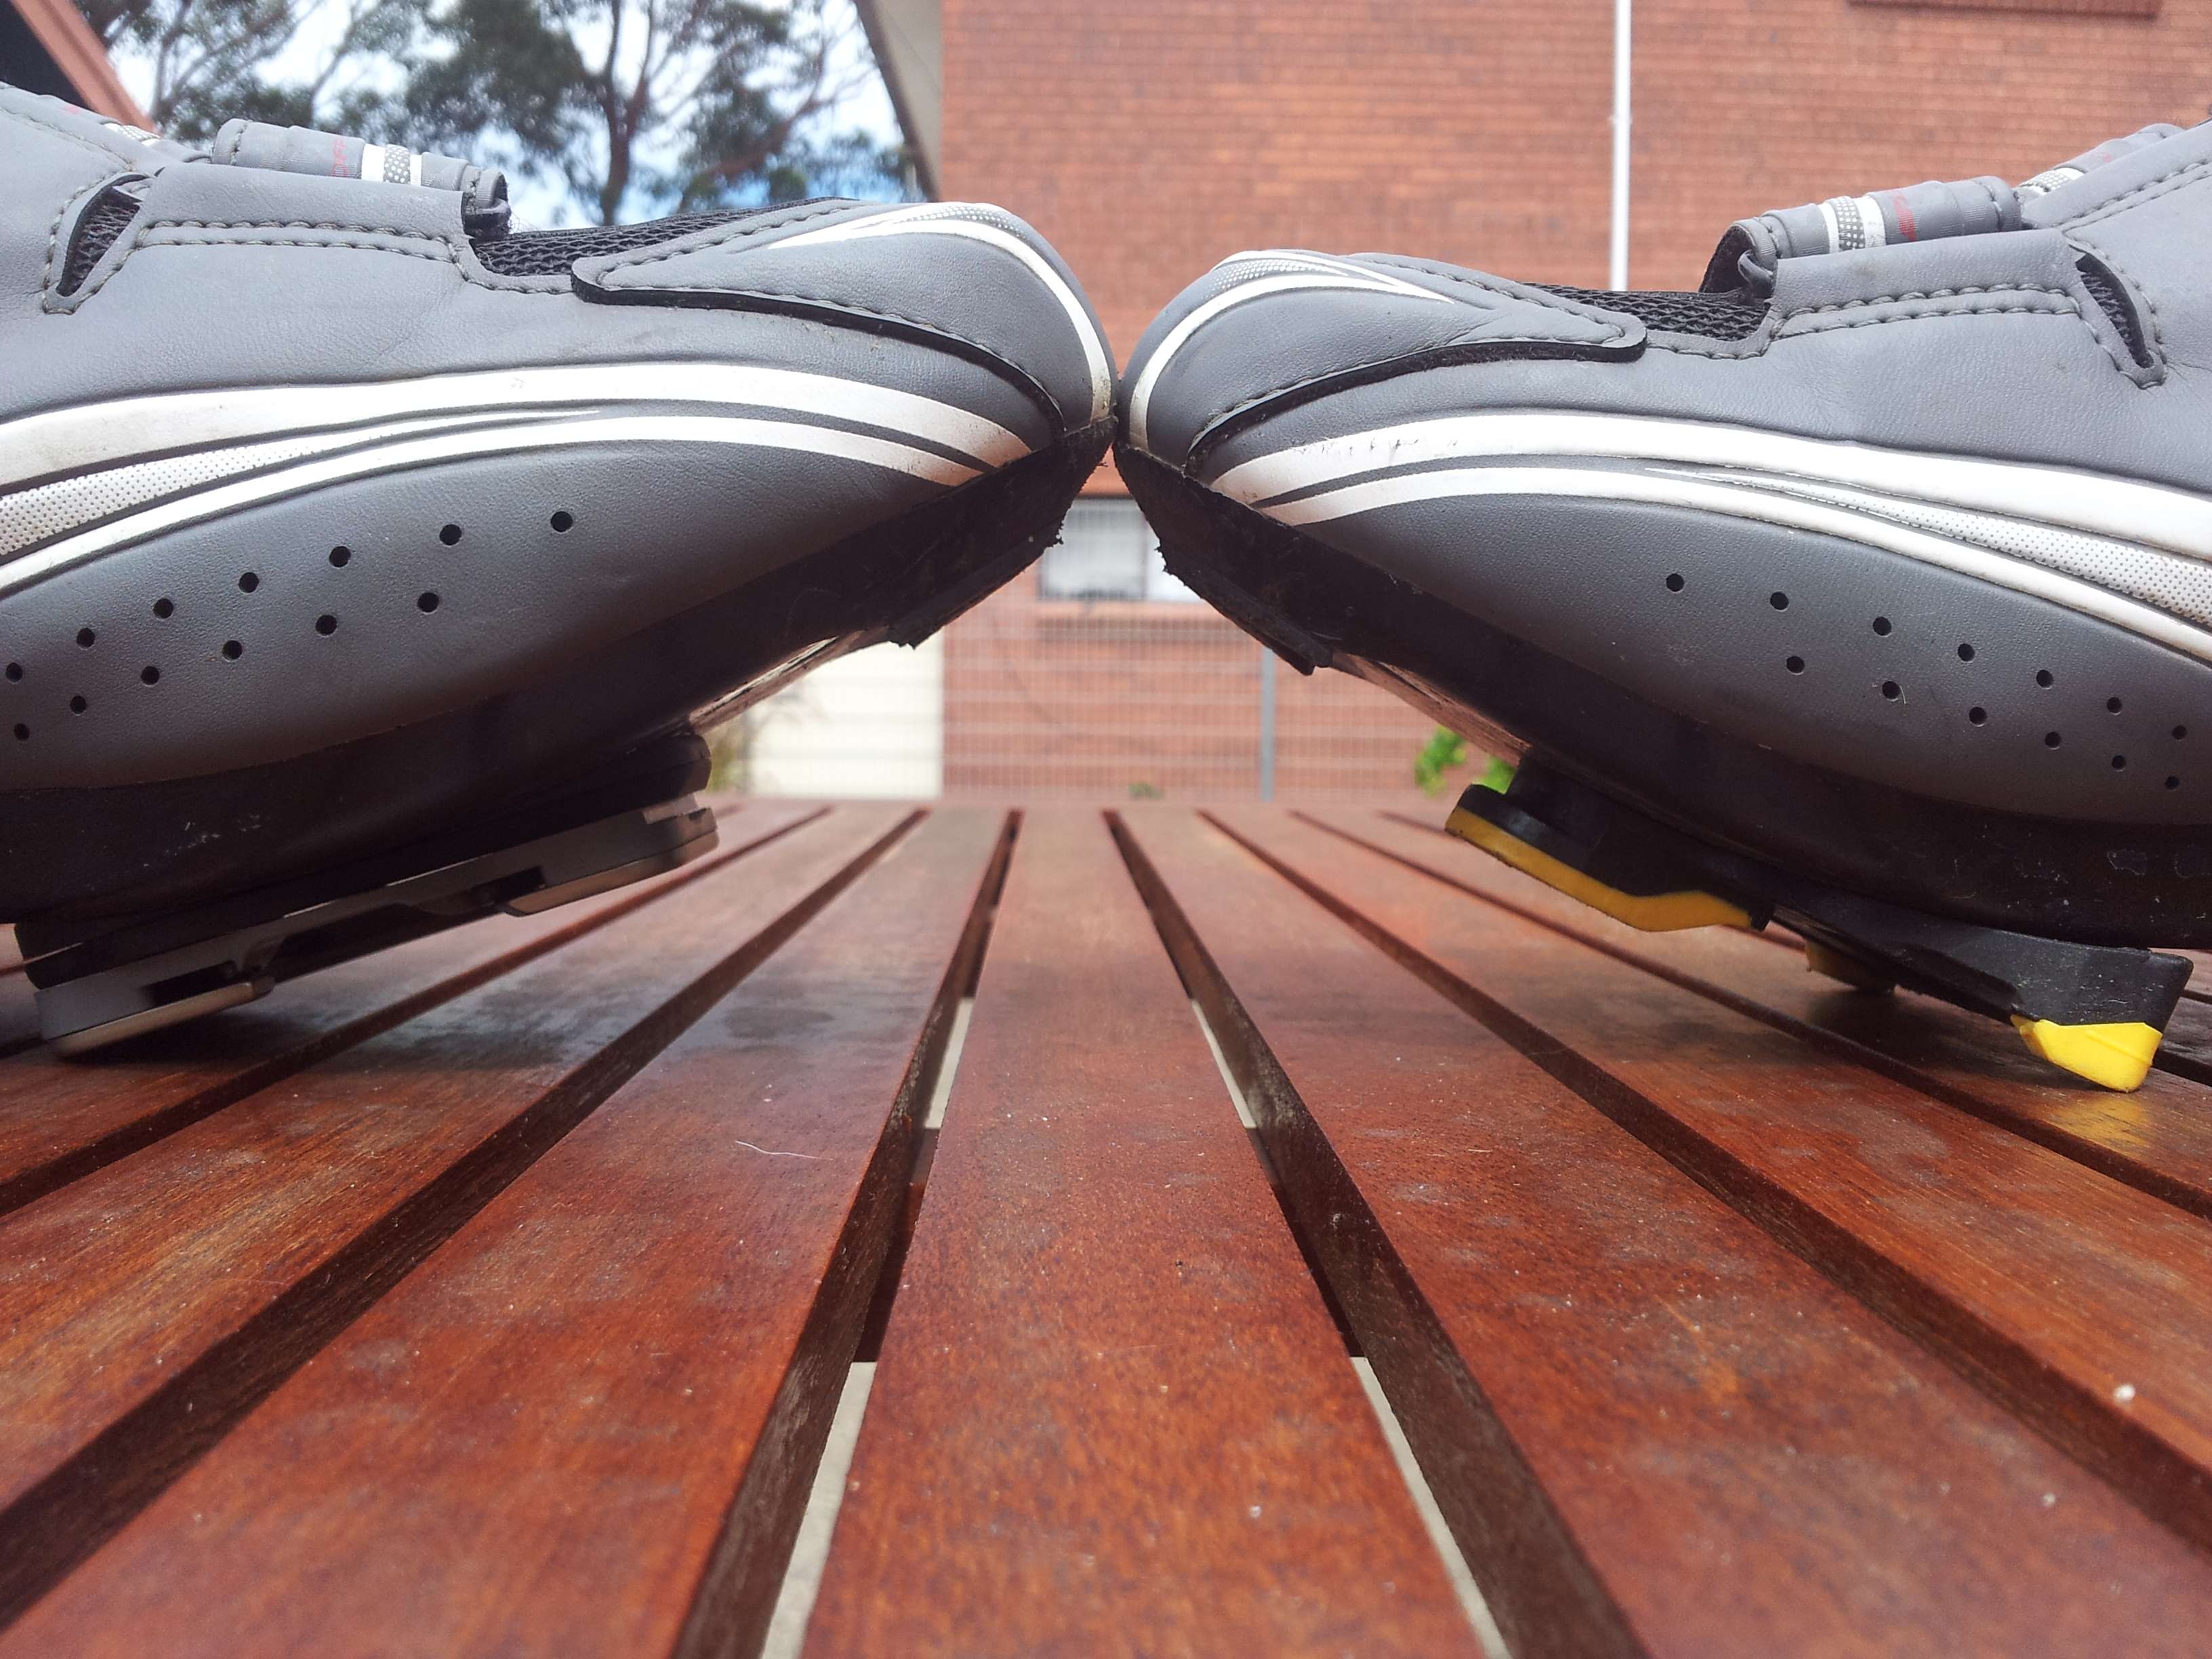
Speedplay (left) and SPD-SL (right)
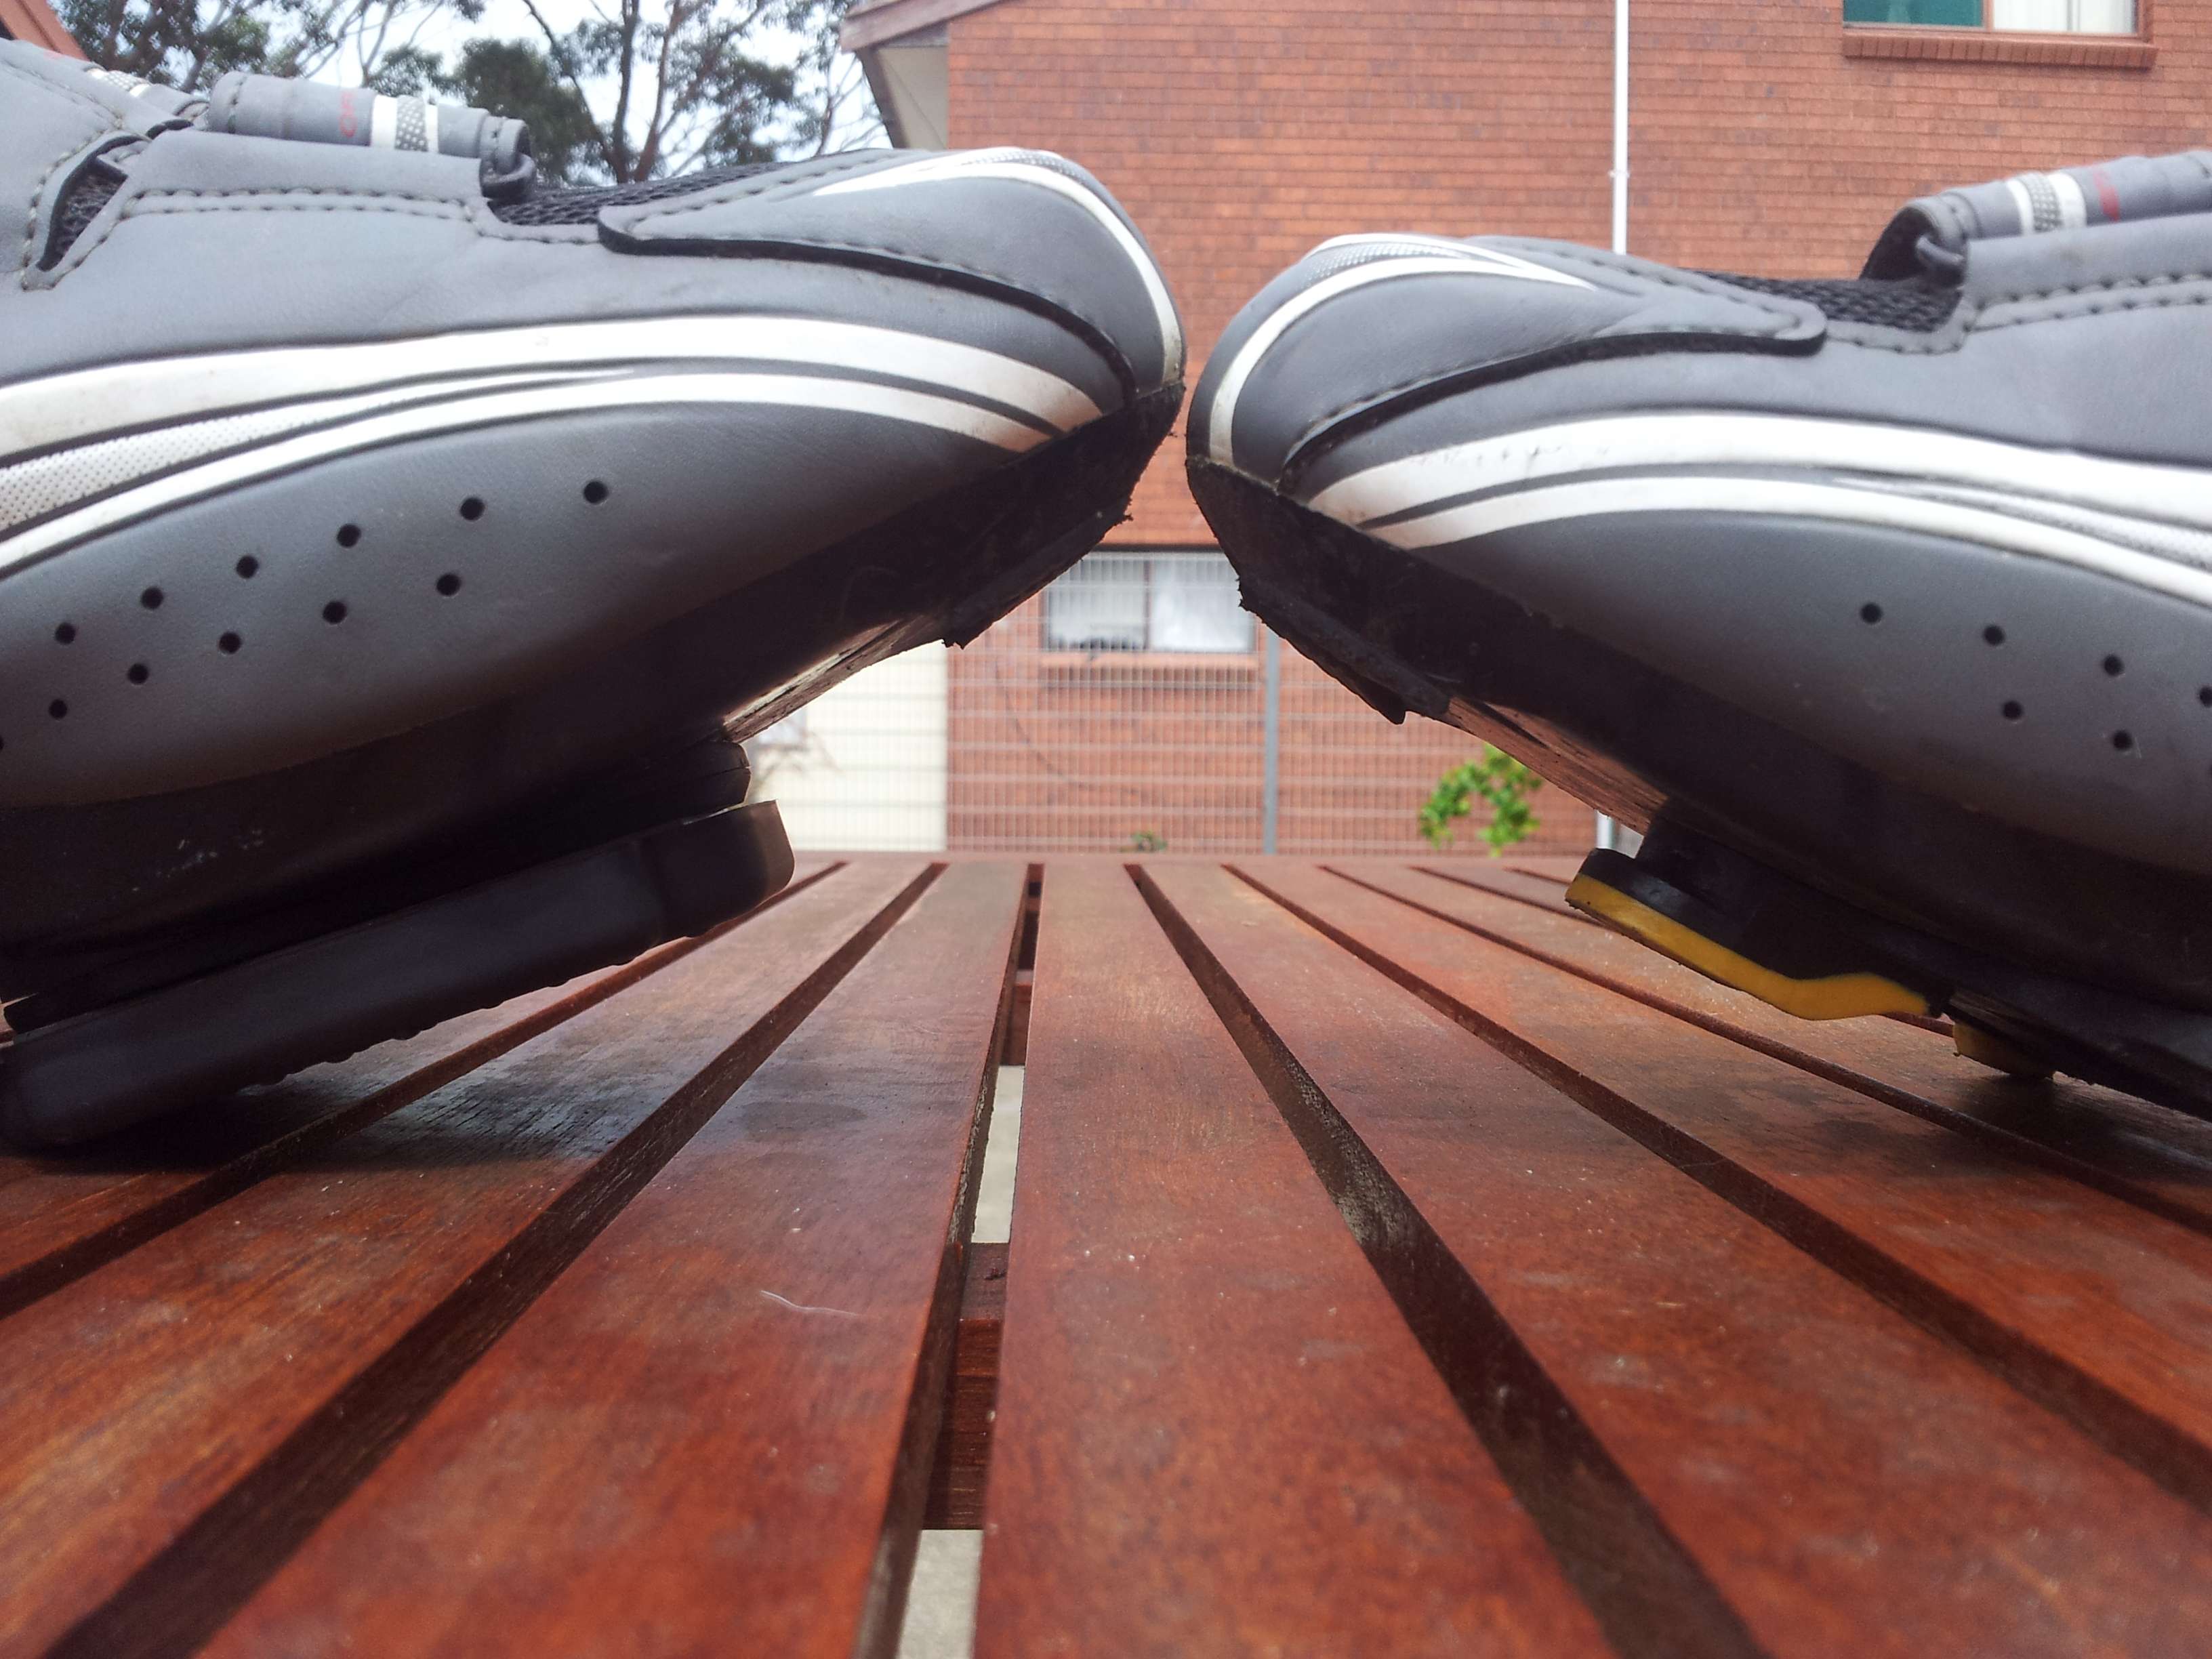
Speedplay with Coffee Shop Covers (left)

As you can see above, there is only a very small difference in added height with the adaptor plate. With the coffee shop covers, there is a bit more of a step up. It doesn’t look like a lot, but it feels like a lot when you walk in them.

The coffee shop covers are to protect the cleat when you are off the bike. They are extremely easy to put on and get off, and will fit in the pocket of your jersey or a saddle bag easily. They will also protect wooden flooring at home or out at your local cafe.
I also got the pedal platforms, so if I want to jump on the bike to go to the shops, I don’t need the bike shoes. They are easily fitted and great to use.
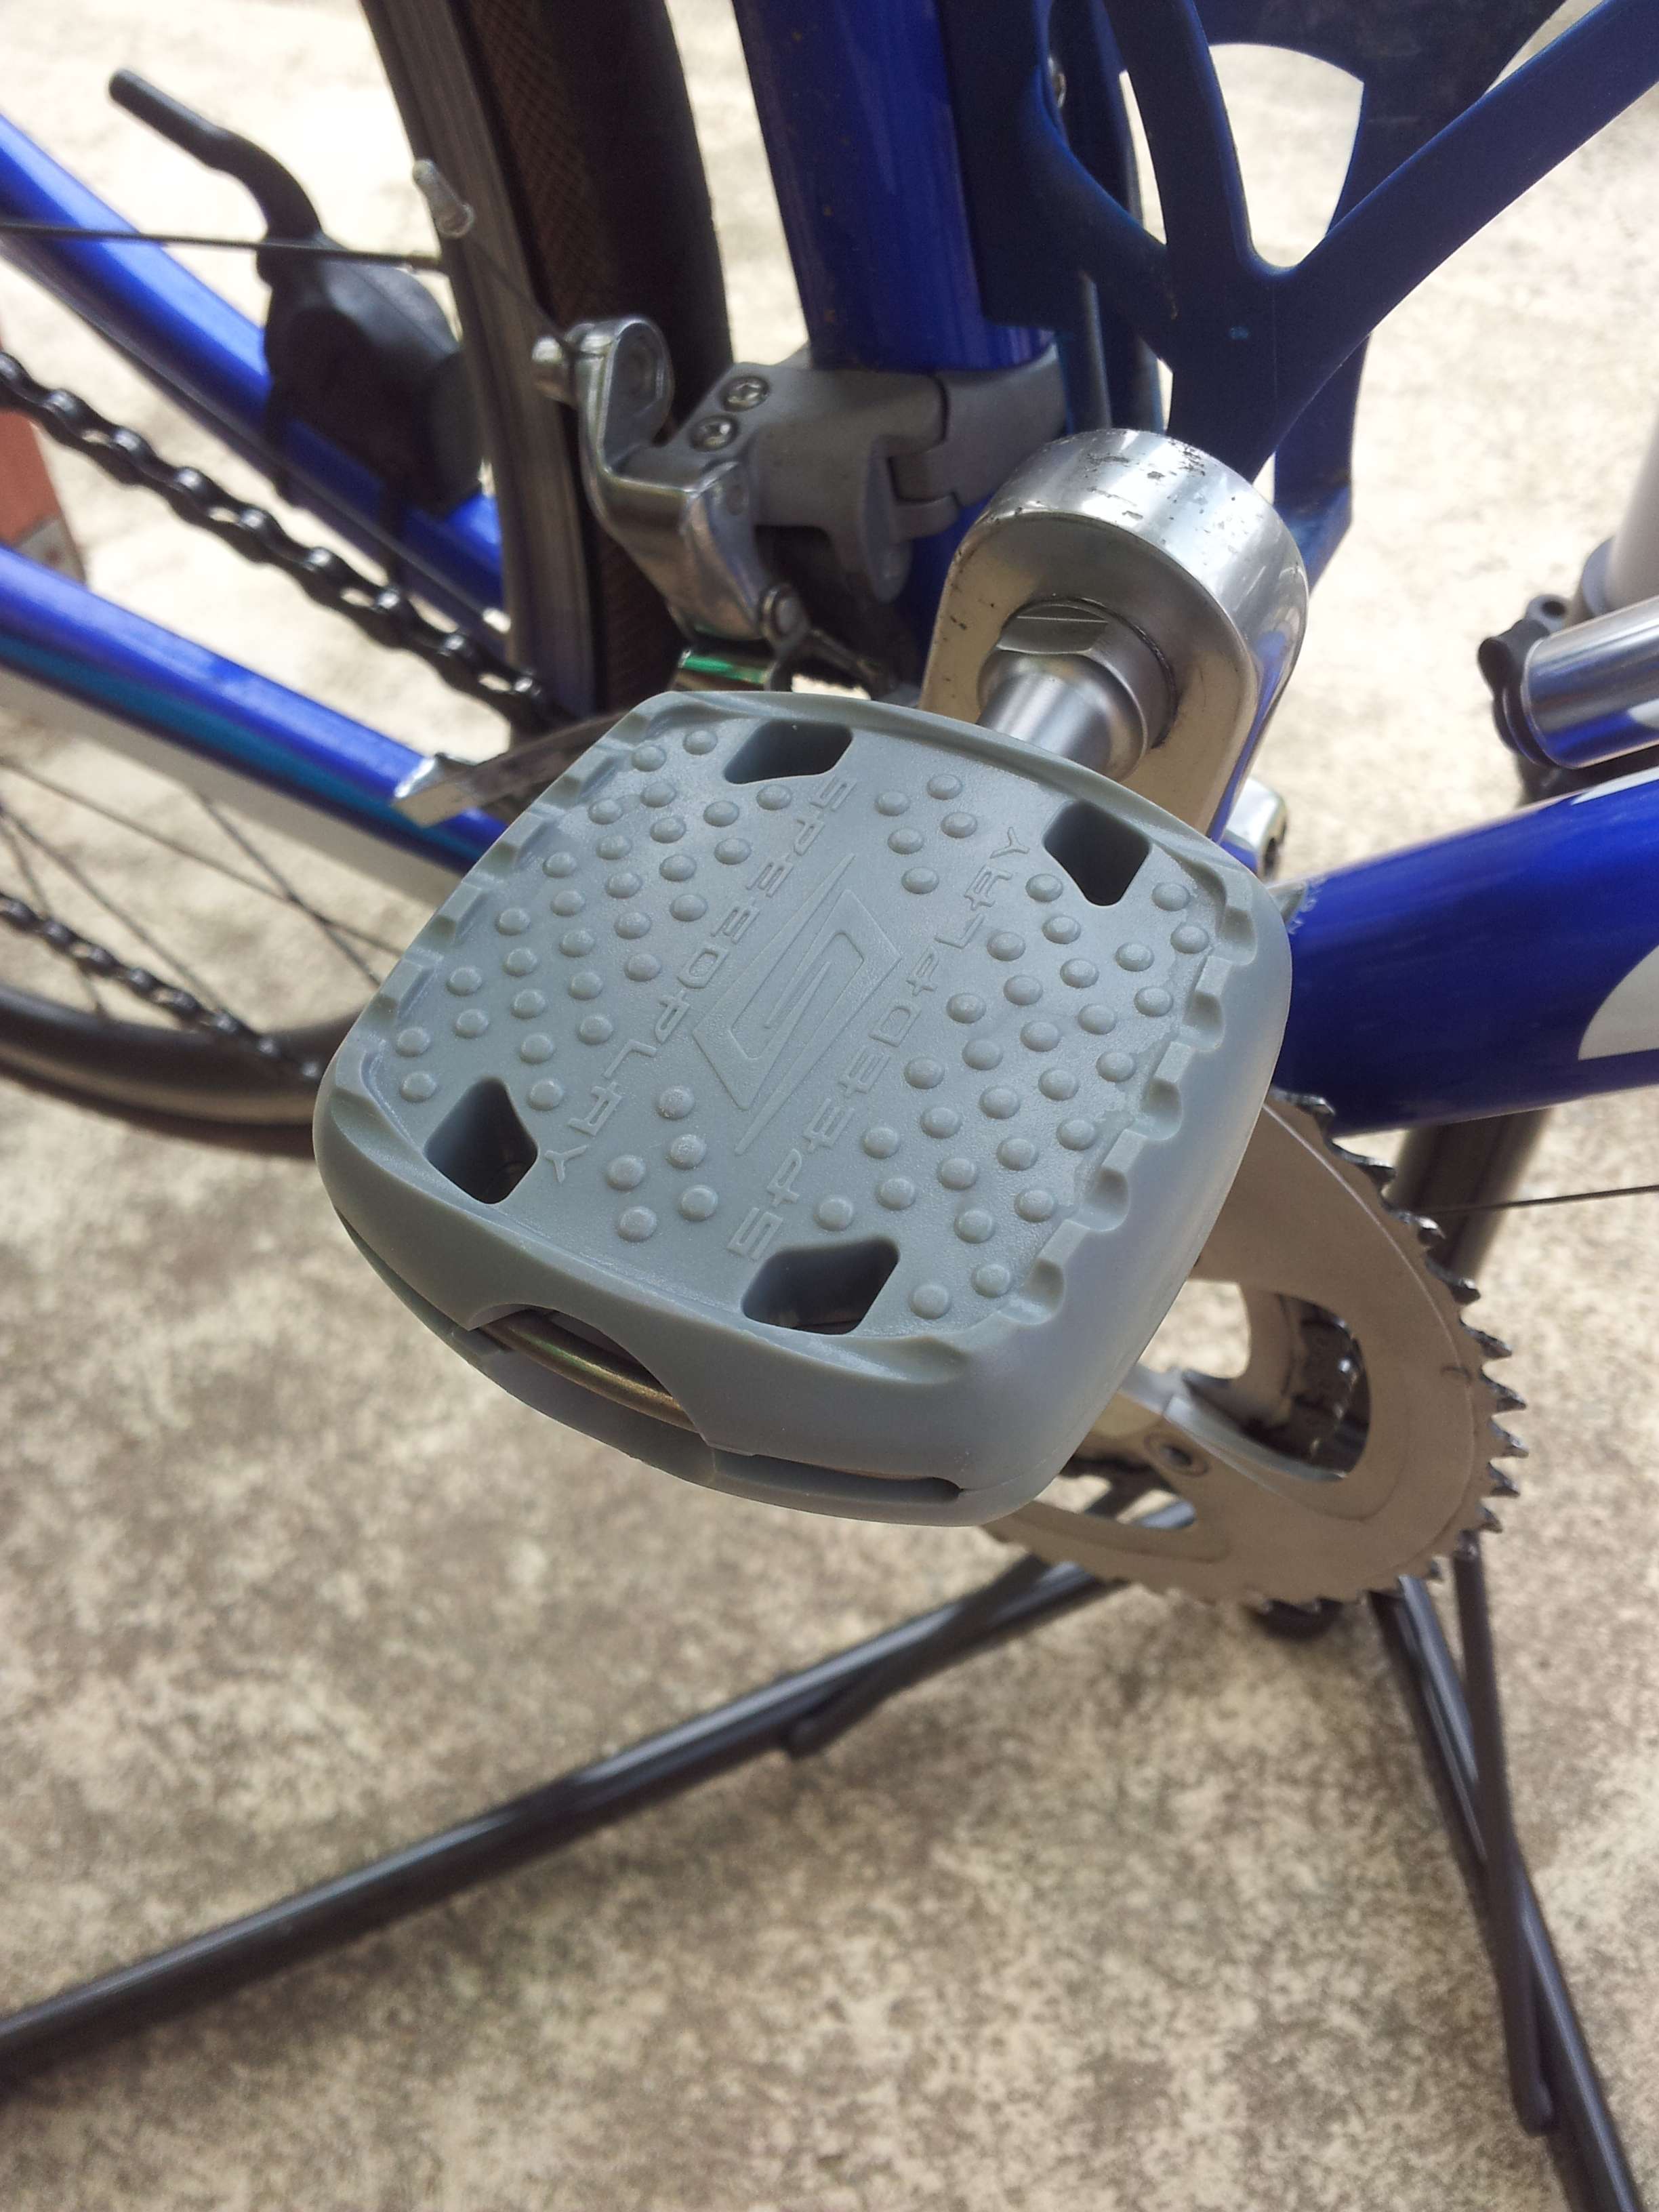
Pedal Platform

To fit them or remove them, you just need a coin or key to disengage the locking pins and then slide the pin out and the covers pull apart.
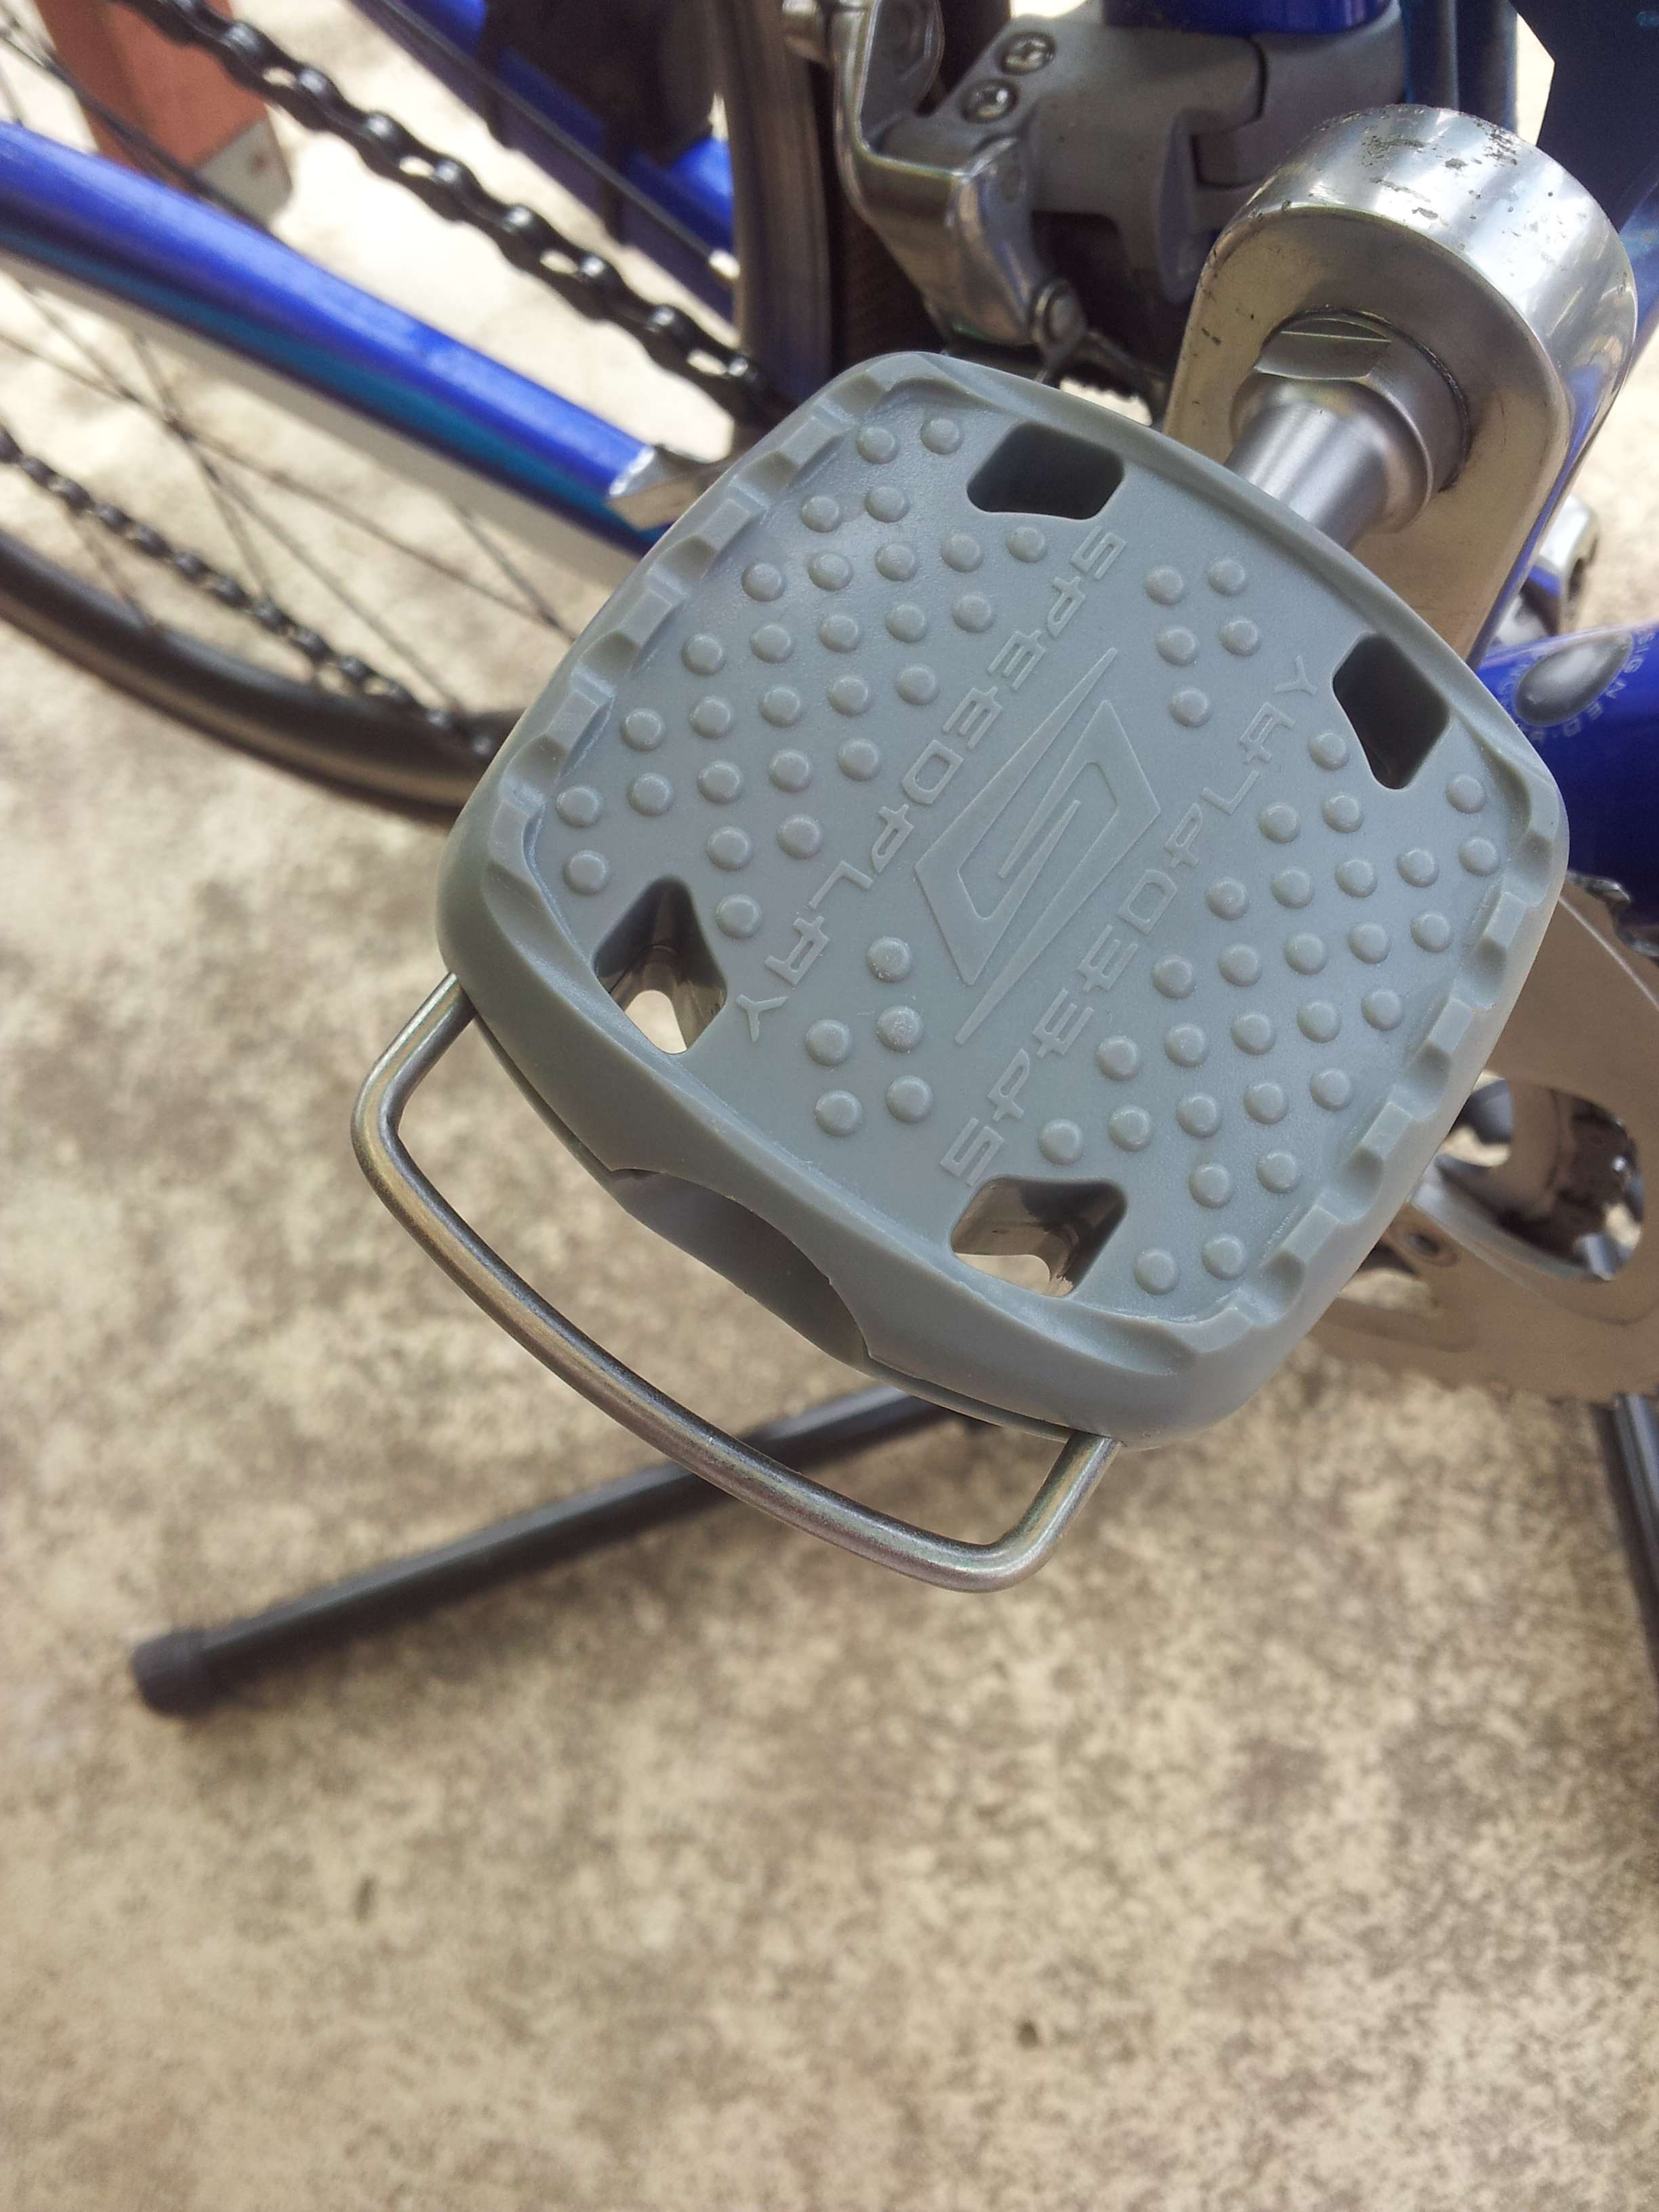
Pedal Platform Locking Pin Being Removed

Simple and easy.

I haven’t been out for a ride on the new pedals as yet, but when I do, I will do a review on their usage.


If you are new to the Clipless Pedal business, here is a terrific article explaining them in more detail.

Posted in General Cycling Info | Tagged , , , , , , , | 2 Comments

Danny MacAskill 2012.

This from the YouTube page.

Profile of street trials rider Danny Macaskill. Using his new Lezyne Engineering tools, Danny Macaskill re-visits his old job, in the workshop of MacDonalds Cycles in Edinburgh Scotland and chats over his rise to success and how life has changed.

Posted in General Cycling Info | Tagged , | 1 Comment

Gruppo Frazionato #4

A very interesting write up regarding drugs in sport at Red Kite Prayer.

Bike Rumour has some news on the Garmin Vector pedals. Garmin Vector Pedal-Based Power Meter Delayed Until Summer – Bike Rumor.

Want to ride easier in the wind? Drafting, Cycling in the Wind Aero Skills | Bicycling Magazine.

A one hundred year old man breaks a cycling record. 100 year old sets first-ever hour record mark for his age group.

Here is an interesting look at helmet technology. Bean Bag Padding Protects Your Noggin Better Than Foam | Gizmodo Australia.

CyclingTips has an article about Strava. Strava – From the Beginning | Cycling Tips.

And finally, possibly the coolest looking bike ever. Deltas 7 IsoTruss CF Bike.

Posted in General Cycling Info | Tagged , , , , , , , , , | Comments Off on Gruppo Frazionato #4

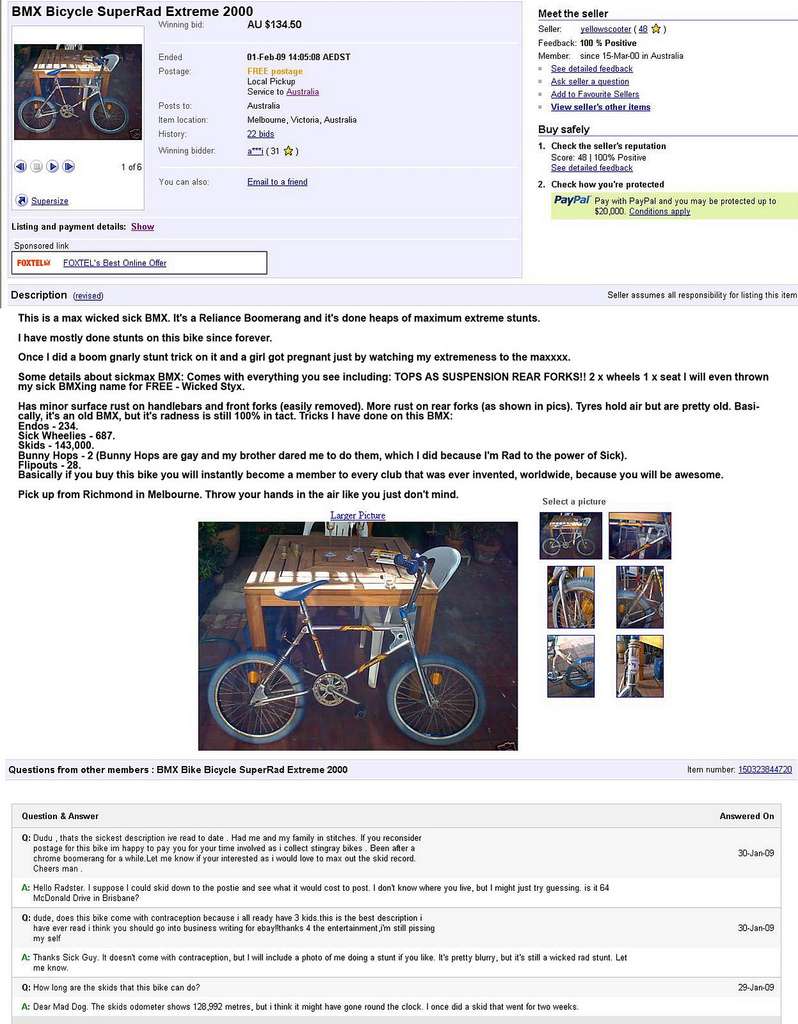
Now this is the way to write an eBay ad.

Apparently it is fake, but I reckon it is worth a look anyway.

Click for larger

Posted in General Cycling Info | Tagged , | Comments Off on Now this is the way to write an eBay ad.